
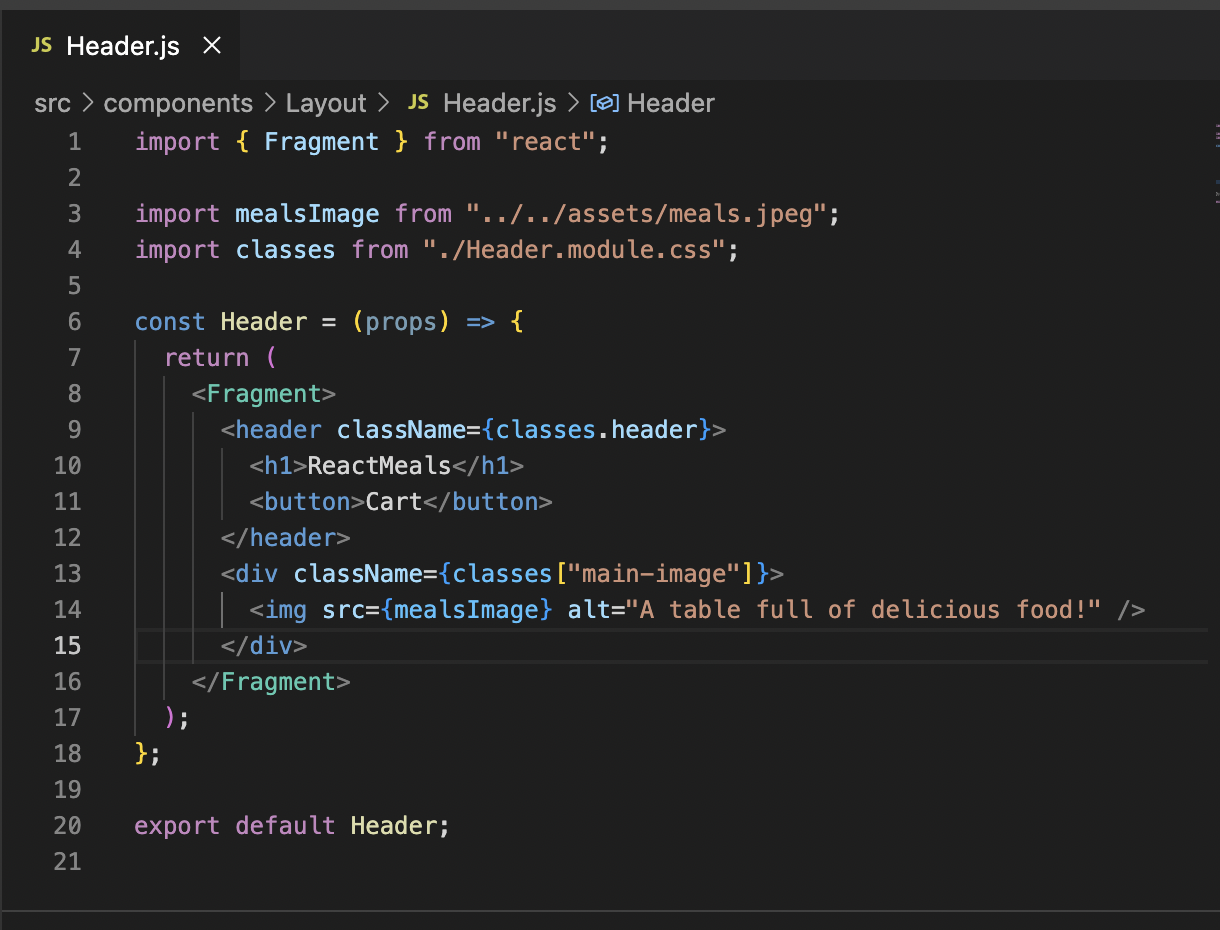
So the based on the web structure we wanna build we organized the folders first.
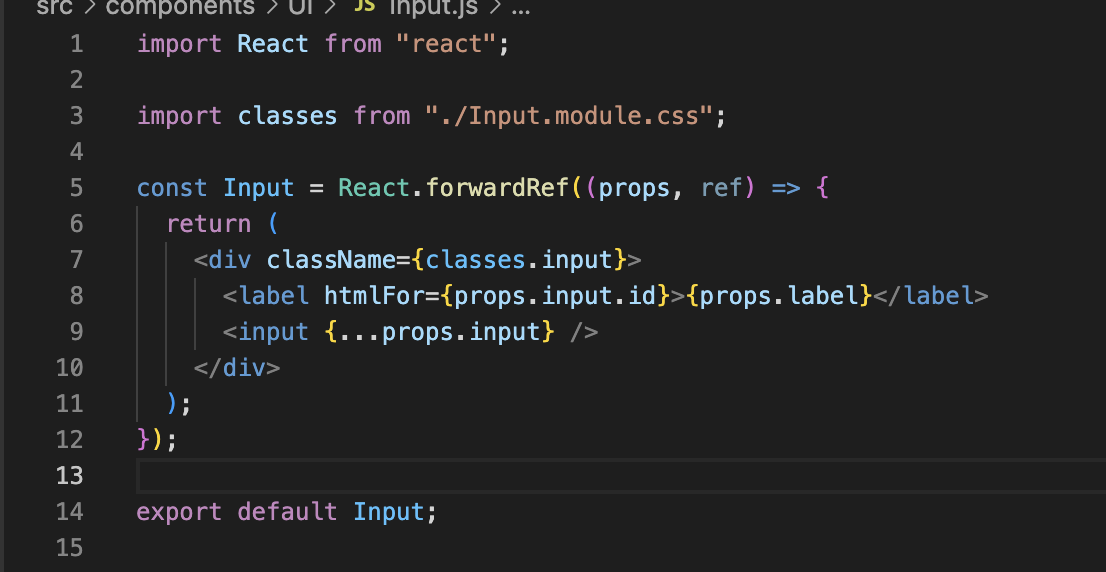
And we started with header first.
we used css class module and used it in className, and since one of the cases has dash '-' we used in [].
We can just organize our code like this.
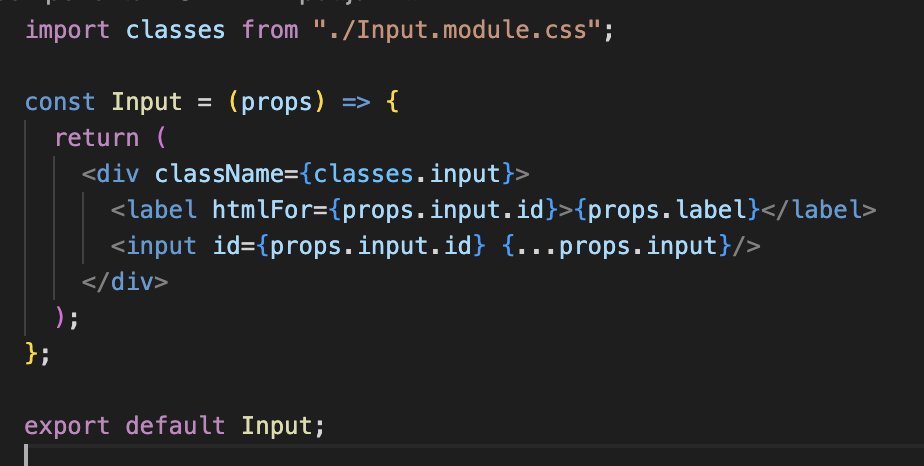
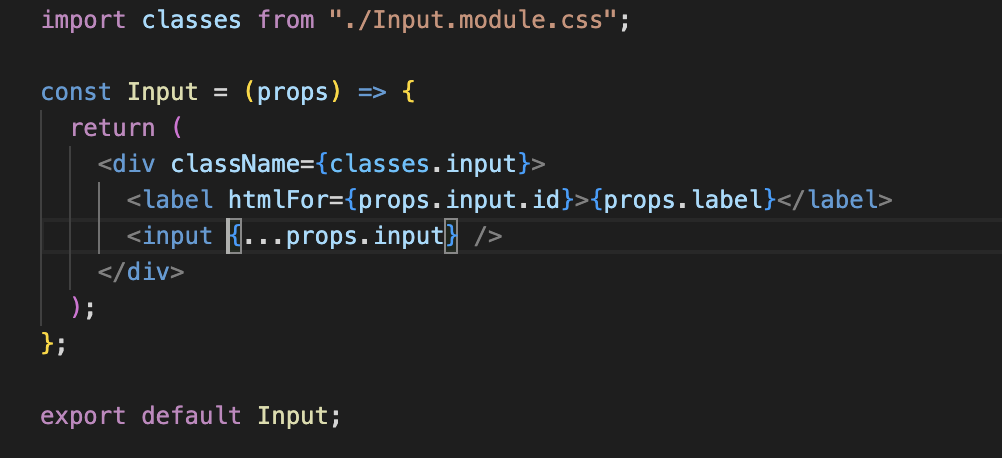
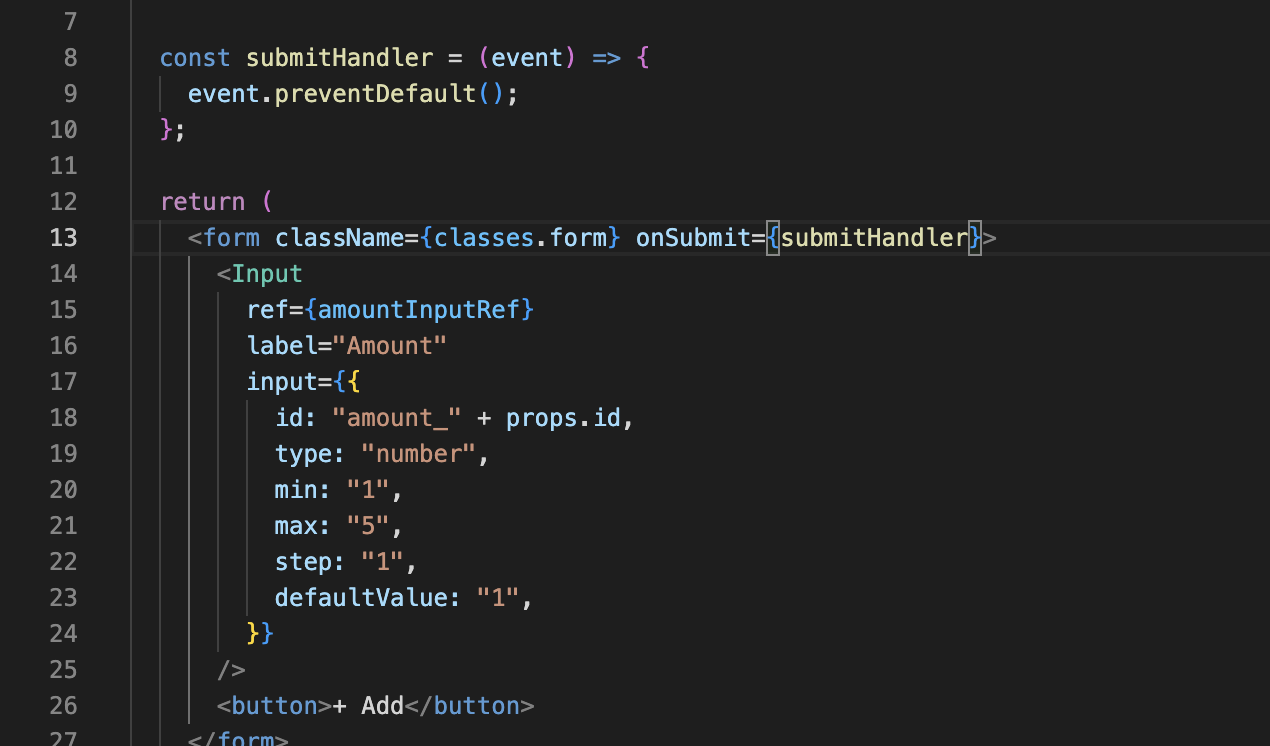
since we will use spread operator, we can just bring some specific item from that props or we can just use spread operator.
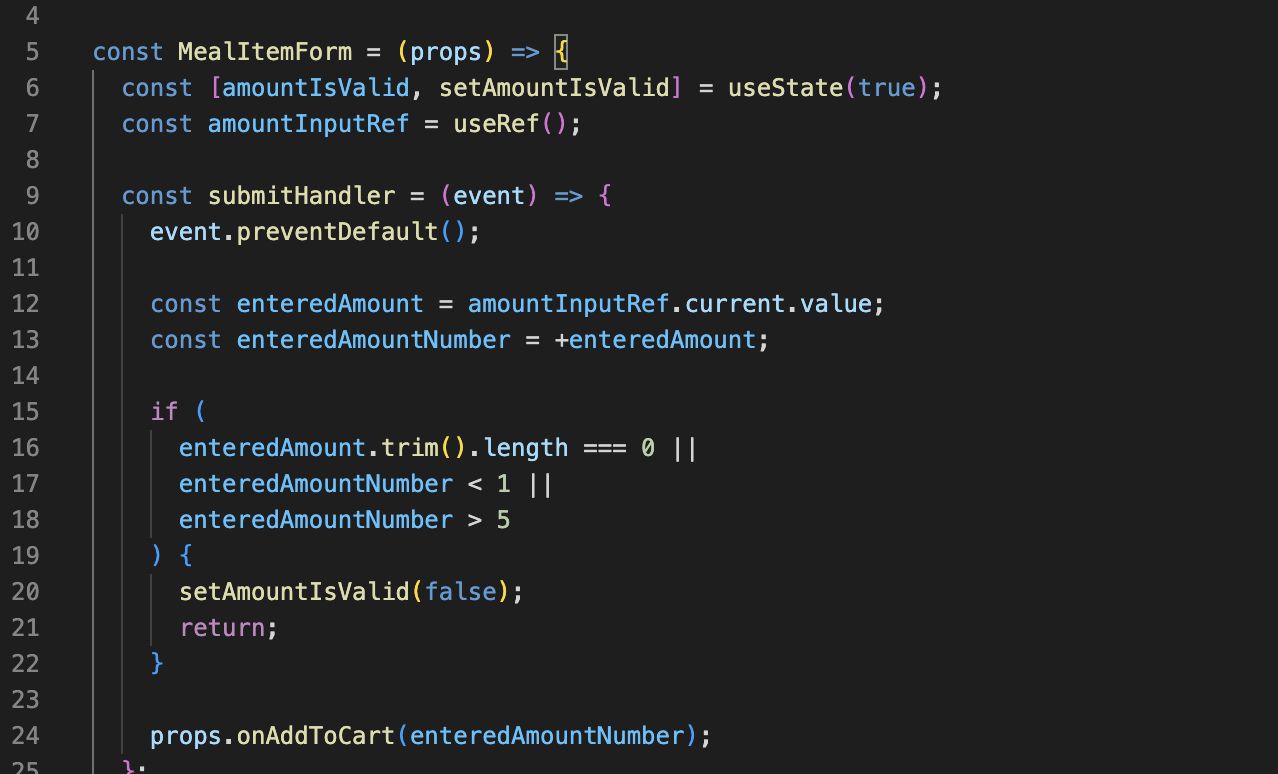
현재 MealItemForm의 적용은, 모든 MealItem <Input /> 이 똑같은 id 받으며, 이전 강의에서 보여준 코드에서 다음을 수행합니다:
<Input
    label='Amount'
    input={{
        id: 'amount',
        type: 'number',
        min: '1',
        max: '5',
        step: '1',
        defaultValue: '1',
    }}
/>
이 방식도 작동하지만 두 가지 주요 단점이 있습니다. 즉시 이해되지 않습니다. (따라서 불행히도 녹음 중에 미끄러졌습니다):
1. 어떤 레이블을 클릭하던 실제 MeatItem에 속한 것이 아니더라도 항상 동일한 첫 번째 입력 요소가 선택됩니다.
2. 스크린리더는 레이블 + 입력을 올바르게 연결할 수 없습니다(모든 레이블이 동일한 입력을 가리키기 때문에).
비디오에 표시된 모든 것은 표시된 대로 작동하며 이것을 수정하는 것은 선택 사항입니다, 하지만 이 문제를 수정하는 것은 쉽기 때문에 아래 조정을 고려할 수 있습니다.
한 가지 가능한 해결 방법은 IDprop을 MealItemForm에 받는 것이고 이를 사용하여 r <Input />당 고유 id 를 생성합니다:
<Input
label='Amount'
input={{
id: 'amount_' + props.id, // this changed!
type: 'number',
min: '1',
max: '5',
step: '1',
defaultValue: '1',
}}
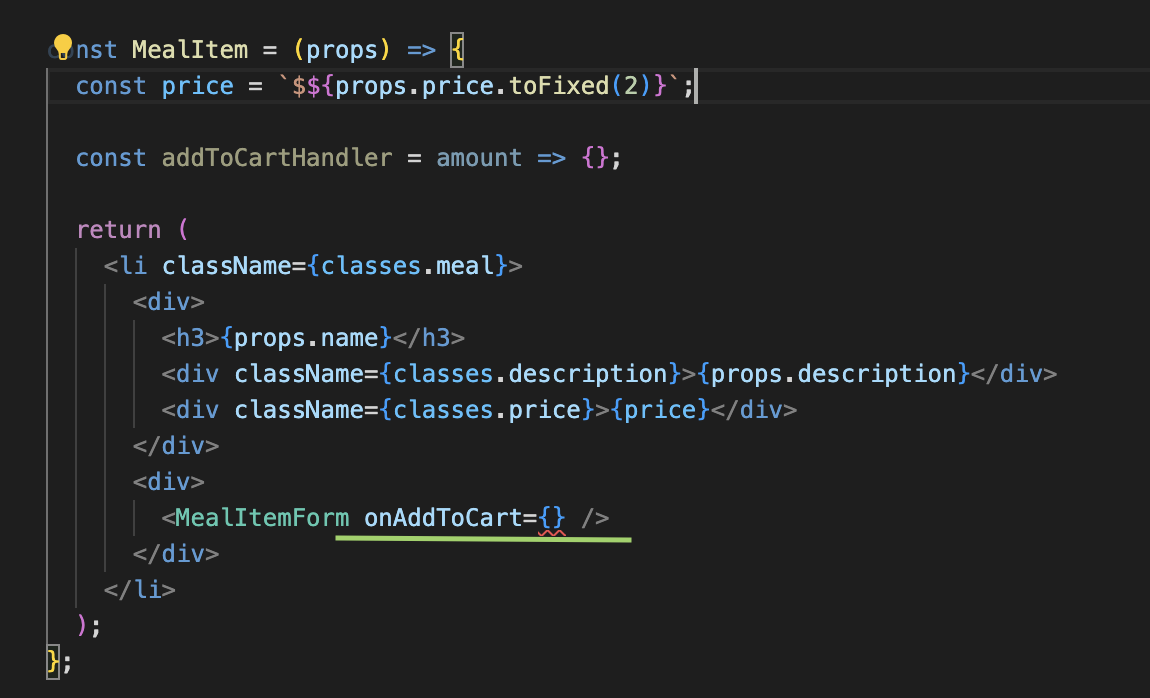
/>우리는 idprops가 <MealItemForm /> 에 올바르게 전달되는지 확인해야 합니다. 해당 구성 요소가 사용 중일 때 말이죠 ( MealItem 구성 요소 안에서):
<MealItemForm id={props.id} />
마지막으로 중요한 것은 id 가 props의 형태로 MealItem에 전달되야 한다는 것이며, 따라서 AvailableMeals 구성 요소 내부에서, 우리는 이와같이 <MealItem /> 요소를 생성해야 합니다:
<MealItem
    id={meal.id} // this is new!
    key={meal.id}
    name={meal.name}
    description={meal.description}
    price={meal.price}
/>
다시 말하지만, 이것은 모두 100% 선택 사항입니다 이 데모 앱의 일반적인 기능과 관련하여 - 이러한 변경 없이 모든 것이 동영상에 표시된 대로 작동합니다. 그러나 적절한 접근성을 위해 이러한 조정을 고려해야 합니다.
또한 이러한 변경 사항을 반영하기 위해 모든 코드 스냅샷을 업데이트했습니다.
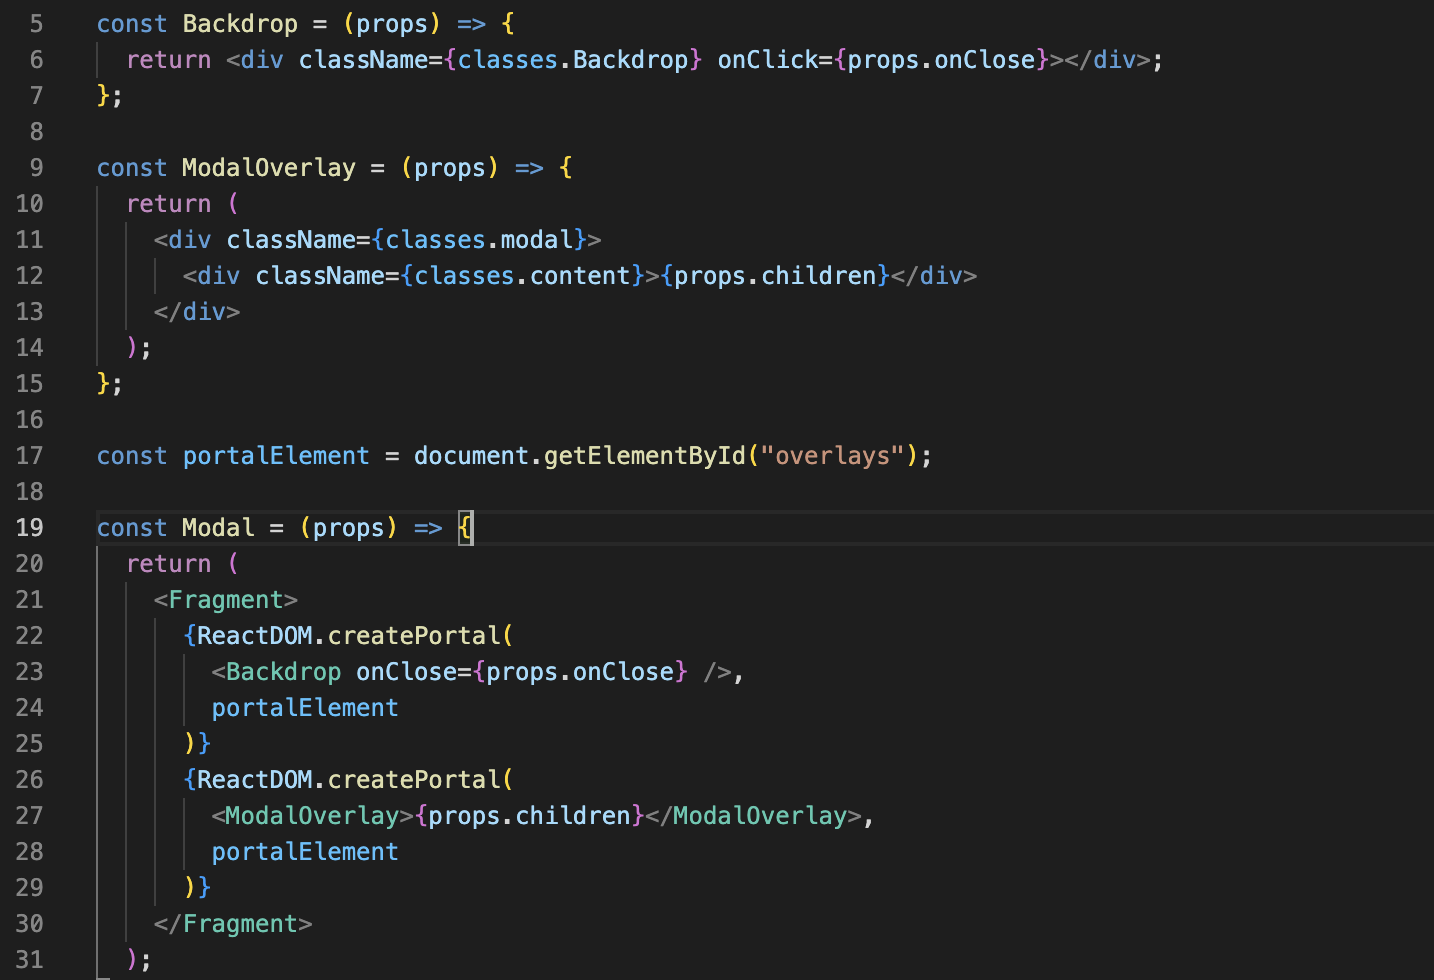
React Portal
We are gonna use portal for back drop here which blocks interaction with the rest of the page.
And we also wanna render the modal overlay itself.
Go to index.html and add portals.
Building a modal in React with React Portals
In React apps, a component or element is mounted into the DOM as a child of the nearest parent node. From top to bottom, the standard layer hierarchy is as follows:
root node => parent nodes => child nodes => leaf nodesIf the parent node has an overflow property set to hidden, or has elements at higher layers, then the child cannot appear on the top layer and is limited to the parent node’s visible area. We can try setting a very high z-index value to bring the child to the top layer, but this strategy can be tedious and is not always successful.
This is where React Portals are advantageous. React Portals provides the ability for an element to render outside the default hierarchy without compromising the parent-child relationship between components.
Creating the React Portal
A React Portal can be created using the createPortal function imported from react-dom. It takes two arguments:
- content: any valid renderable React element
- containerElement: a valid DOM element to which we can append the content
ReactDOM.createPortal(content, containerElement);We’ll create a new component, ReactPortal.js, under the src/components directory and add this snippet:
// src/components/ReactPortal.js
import { createPortal } from 'react-dom';

function ReactPortal({ children, wrapperId }) {
  return createPortal(children, document.getElementById(wrapperId));
}
export default ReactPortal;
The ReactPortal component accepts the wrapperId property, which is the ID attribute of a DOM element and acts as the container for the portal.
It’s important to note that the createPortal() function will not create the containerElement for us. The function expects the container to be available in the DOM already; we must add it ourselves in order for the portal to render content within the element.
We can customize the ReactPortal component to create an element with the provided ID, if such an element is not found in the DOM.
React Portal is a first-class way to render child components into a DOM node outside of the parent DOM hierarchy defined by the component tree hierarchy. The Portal's most common use cases are when the child components need to visually break out of the parent container as shown below.
- Modal dialog boxes
- Tooltips
- Hovercards
- Loaders
A Portal can be created using ReactDOM.createPortal(child, container). Here the child is a React element, fragment, or a string, and the container is the DOM location(node) to which the portal should be injected.
Why do we need it?
When we use a modal inside a particular element (a parent component), the modal's height and width will be inherited from the component in which the modal resides. So there is a possibility that the modal will be cropped and not be shown properly in the application. A traditional modal will require CSS properties like overflow:hidden and z-index to avoid this issue.
A typical modal where the parent component overrides the height and width
The above code example will result in rendering the modal inside the nested components under the root. When you inspect the application using your browser, it will display the elements, as shown below.
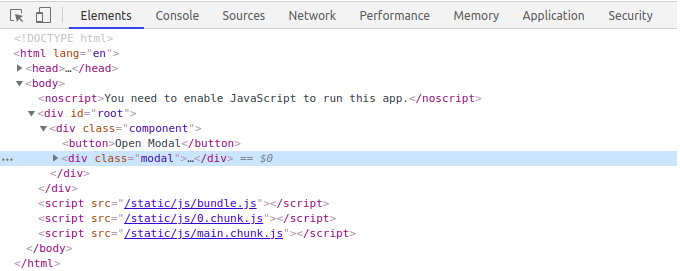
Modal rendered without React Portal.
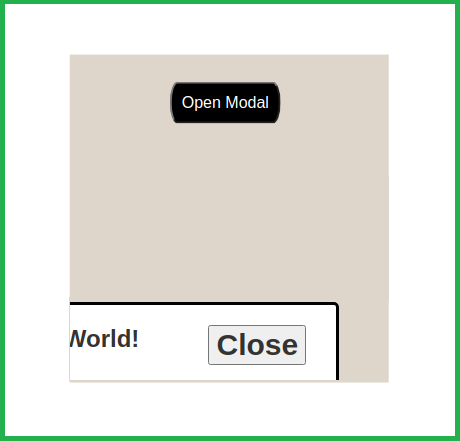
Let's see how React Portal can be used here. The following code will resolve this issue using the createPortal() to create a DOM node outside of the root tree hierarchy.
const Modal =({ message, isOpen, onClose, children })=> {
  if (!isOpen) return null;
  return ReactDOM.createPortal(
     <div className="modal">
      <span>{message}</span>
      <button onClick={onClose}>Close</button>
     </div>
    ,document.body);
  }function Component() {
  const [open, setOpen] = useState(false)
  return (
    <div className="component">
      <button onClick={() => setOpen(true)}>Open Modal</button>
      <Modal
       message="Hello World!"
       isOpen={open}
       onClose={() => setOpen(false)}
      />
    </div>
  )
}
Shown below is the DOM tree hierarchy, which will be resulted when using React Portals, where the modal will be injected outside of the root, and it will be at the same level as the root.
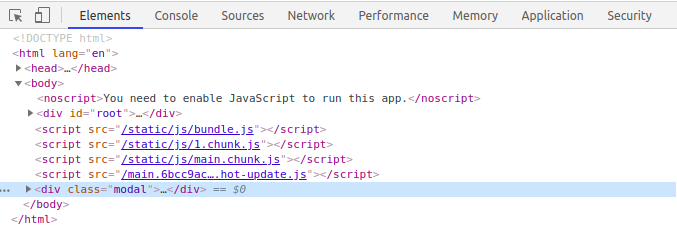
Modal rendered with React Portal
Since this modal is rendered outside of the root hierarchy, its dimensions would not be inherited or altered by the parent components.
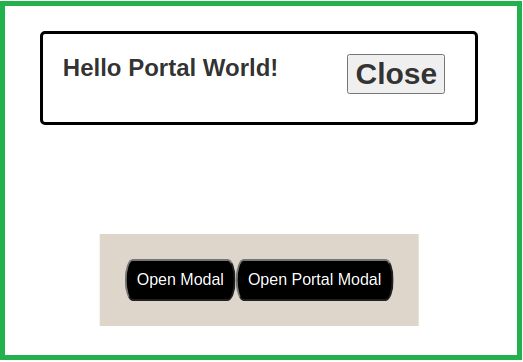
A model rendered as a Portal
You can find this example through this CodeSandbox, where you can play around with the code, see how the portal works, and address the issues being discussed.
Things to consider when using Portals
When using React Portals, there are several areas you should be mindful of. These behaviors are not visible directly unless you get to know them. Therefore I thought of mentioning them here.
- Event Bubbling will work as usual — Event bubbling will work as expected by propagating events to the React tree ancestors, regardless of the Portal node location in the DOM.
- React has control over Portal nodes and its lifecycle — When rendering child elements through Portals, React still has control over their lifecycle.
- Portals only affect the DOM structure — Portals only affect the HTML DOM structure and not impact the React components tree.
- Predefine HTML mount point — When using Portals, you need to define an HTML DOM element as the Portal component’s mount point.
This is how we used in our code

Now we need to manage the state of cart and modal cause there would be some chages and we need to re-render the looking of it.
1. show modal
2. hide modal
=> 2 states
So we will use 'useState' to manage it and apply in on App.js cause that is the file we will render cart and modal.
So we set the state for the cart and use 'useState' and we added two handlers.
and it will change the state of cartIsShown variable.
and we use dynamic syntax to check if the cartIsShown is true or not to decide to show the Cart component.
We need to have some function to put this handler so we can choose to show or not show this Cart component.
So in this case, we will put that on <Header />.
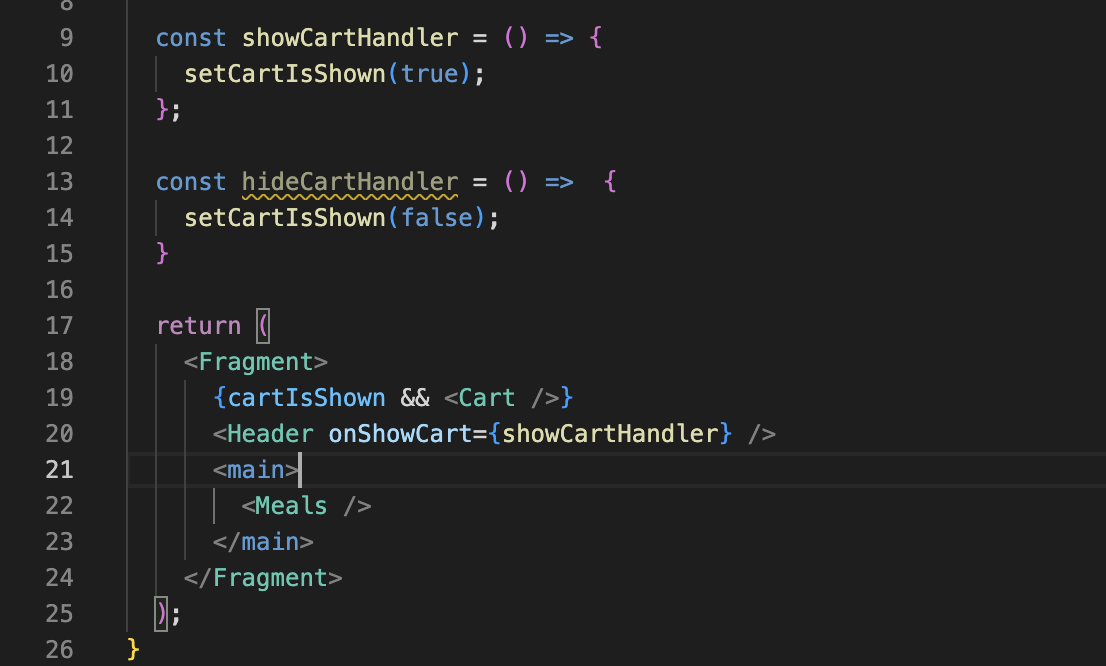
So we put the function on Header and gave props name 'onShowCart'
Now we need to be available to control this function with button.
We will go to Header.js and connect with the <HeaderCartButton> component.
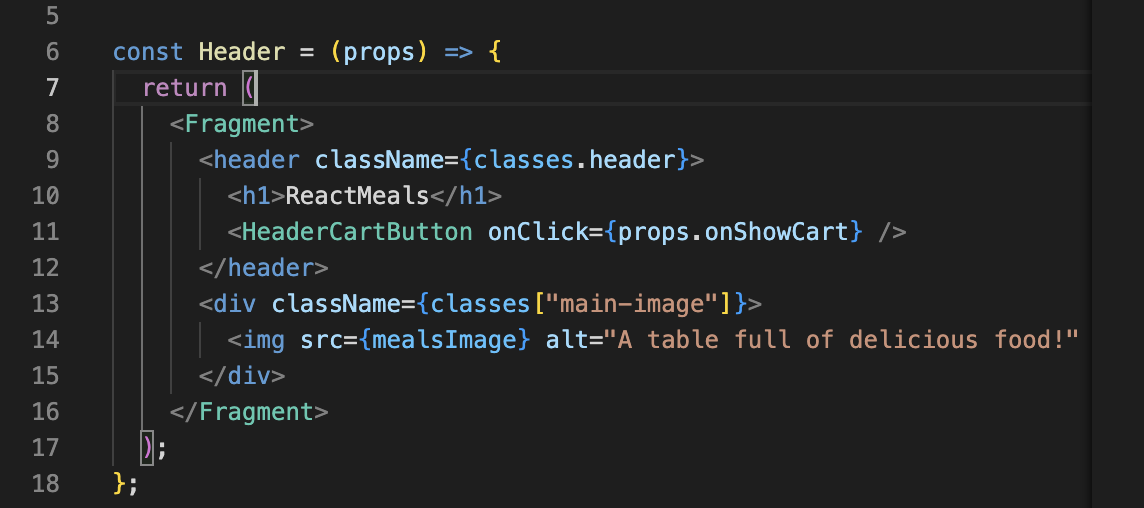
So we get the props and bring the 'onShowCart' prop that we gave inside of App.js component.
We should also manage the function at the <HeaderCartButton> component so they can know what they should do.
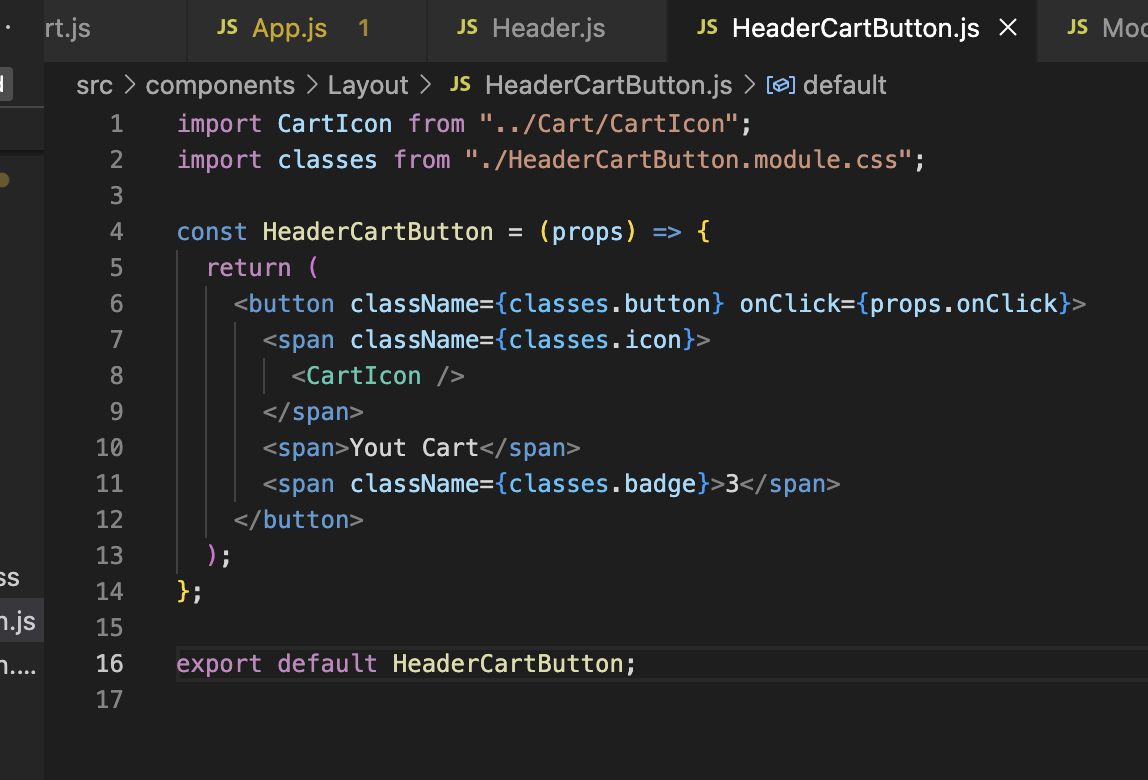
And here we can point {props.onClick} cause we added like that in 'Header.js" component.
So basically just we are passing down the props. => props chain
And we know that it can be quite complicated to do like this so we already learned to make this better.
Context!
And we can use context at the file which handles the visibility of that component.
So in our case it's <App.js>
And here to close the backdrop we are sending the function as props on many levels.
We can use context, but we also wanna highlight that if we are using context and we always bind a Click on the backdrop to close the Cart, then we would make the spectrum very specific and you would not be able to use the Modal for ever kinds of content.
Because clicking the backdrop would always close the Cart. So if you had our content, in Modals as well.
Then you would be too specific. So here, using multiple levels of props, could even be better, because in this case, it makes the Modal more reusable and doesn't tie it to one specific use case.
I think using props instead of context is good, even though we are passing data or to be precise a function through multiple levels of components in this case.
Now we will make the function to add item in cart. We will need props in many components so we will use context here.
Make folders first which name are 'store' in each 'src' folder and 'asset' folder.
It's convention to set name as 'store' for this wide state management application.
What is React context?
React context allows us to pass down and use (consume) data in whatever component we need in our React app without using props.
In other words, React context allows us to share data (state) across our components more easily.
When should you use React context?
React context is great when you are passing data that can be used in any component in your application.
These types of data include:
- Theme data (like dark or light mode)
- User data (the currently authenticated user)
- Location-specific data (like user language or locale)
Data should be placed on React context that does not need to be updated often.
Why? Because context was not made as an entire state management system. It was made to make consuming data easier.
You can think of React context as the equivalent of global variables for our React components.
What problems does React context solve?
React context helps us avoid the problem of props drilling.
Props drilling is a term to describe when you pass props down multiple levels to a nested component, through components that don't need it.
Here is an example of props drilling. In this application, we have access to theme data that we want to pass as a prop to all of our app's components.
As you can see, however, the direct children of App, such as Header, also have to pass the theme data down using props.
export default function App({ theme }) {
  return (
    <>
      <Header theme={theme} />
      <Main theme={theme} />
      <Sidebar theme={theme} />
      <Footer theme={theme} />
    </>
  );
}

function Header({ theme }) {
  return (
    <>
      <User theme={theme} />
      <Login theme={theme} />
      <Menu theme={theme} />
    </>
  );
}
What is the issue with this example?
The issue is that we are drilling the theme prop through multiple components that don't immediately need it.
The Header component doesn't need theme other than to pass it down to its child component. In other words, it would be better for User , Login and Menu to consume the theme data directly.
This is the benefit of React context – we can bypass using props entirely and therefore avoid the issue of props drilling.
How do I use React context?
Context is an API that is built into React, starting from React version 16.
This means that we can create and use context directly by importing React in any React project.
There are four steps to using React context:
- Create context using the createContext method.
- Take your created context and wrap the context provider around your component tree.
- Put any value you like on your context provider using the value prop.
- Read that value within any component by using the context consumer.
Does all this sound confusing? It's simpler than you think.
Let's take a look at a very basic example. In our App, let's pass down our own name using Context and read it in a nested component: User.
import React from 'react';

export const UserContext = React.createContext();

export default function App() {
  return (
    <UserContext.Provider value="Reed">
      <User />
    </UserContext.Provider>
  )
}

function User() {
  return (
    <UserContext.Consumer>
      {value => <h1>{value}</h1>}
      {/* prints: Reed */}
    </UserContext.Consumer>
  )
}
Let's break down what we are doing, step-by-step:
- Above our App component, we are creating context with React.createContext() and putting the result in a variable, UserContext. In almost every case, you will want to export it as we are doing here because your component will be in another file. Note that we can pass an initial value to our value prop when we call React.createContext().
- In our App component, we are using UserContext. Specifically UserContext.Provider. The created context is an object with two properties: Provider and Consumer, both of which are components. To pass our value down to every component in our App, we wrap our Provider component around it (in this case, User).
- On UserContext.Provider, we put the value that we want to pass down our entire component tree. We set that equal to the value prop to do so. In this case, it is our name (here, Reed).
- In User, or wherever we want to consume (or use) what was provided on our context, we use the consumer component: UserContext.Consumer. To use our passed down value, we use what is called the render props pattern. It is just a function that the consumer component gives us as a prop. And in the return of that function, we can return and use value.
What is the useContext hook?
Looking at the example above, the render props pattern for consuming context may look a bit strange to you.
Another way of consuming context became available in React 16.8 with the arrival of React hooks. We can now consume context with the useContext hook.
Instead of using render props, we can pass the entire context object to React.useContext() to consume context at the top of our component.
Here is the example above using the useContext hook:
import React from 'react';

export const UserContext = React.createContext();

export default function App() {
  return (
    <UserContext.Provider value="Reed">
      <User />
    </UserContext.Provider>
  )
}

function User() {
  const value = React.useContext(UserContext);

  return <h1>{value}</h1>;
}
The benefit of the useContext hook is that it makes our components more concise and allows us to create our own custom hooks.
You can either use the consumer component directly or the useContext hook, depending on which pattern you prefer.
You may not need context
The mistake many developers make is reaching for context when once they have to pass props down several levels to a component.
Here is an application with a nested Avatar component that requires two props username and avatarSrc from the App component.
export default function App({ user }) {
  const { username, avatarSrc } = user;

  return (
    <main>
      <Navbar username={username} avatarSrc={avatarSrc} />
    </main>
  );
}

function Navbar({ username, avatarSrc }) {
  return (
    <nav>
      <Avatar username={username} avatarSrc={avatarSrc} />
    </nav>
  );
}

function Avatar({ username, avatarSrc }) {
  return <img src={avatarSrc} alt={username} />;
}
If possible, we want to avoid passing multiple props through components that don't need it.
What can we do?
Instead of immediately resorting to context because we are prop drilling, we should better compose our components.
Since only the top most component, App, needs to know about the Avatar component, we can create it directly within App.
This allows us to pass down a single prop, avatar, instead of two.
export default function App({ user }) {
  const { username, avatarSrc } = user;

  const avatar = <img src={avatarSrc} alt={username} />;

  return (
    <main>
      <Navbar avatar={avatar} />
    </main>
  );
}

function Navbar({ avatar }) {
  return <nav>{avatar}</nav>;
}
In short: don't reach for context right away. See if you can better organize your components to avoid prop drilling.
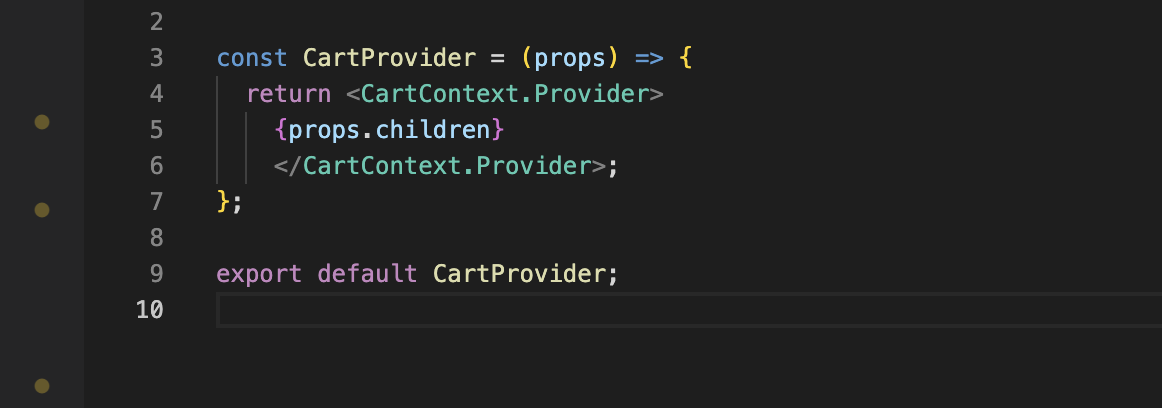
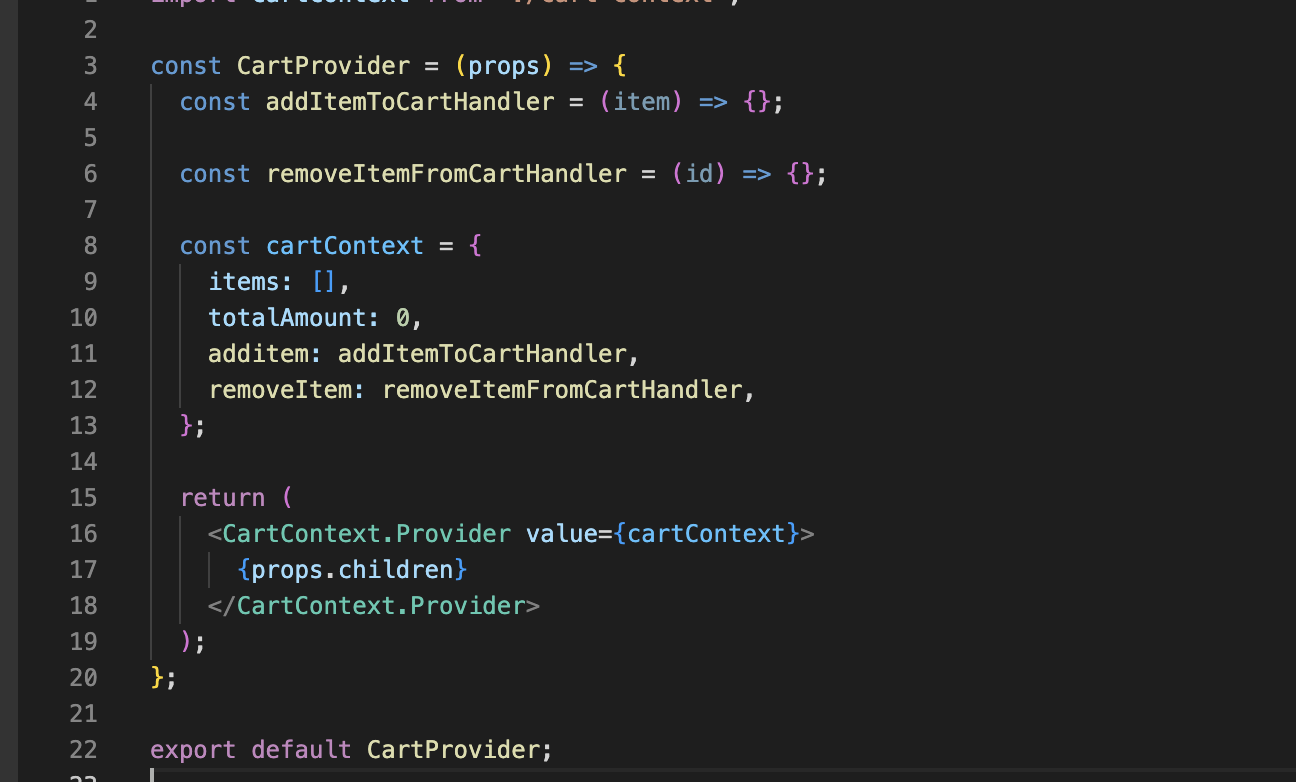
Make 'CartProvider' file and write code like this.
It means that if we surround with provider then we can use data without props!
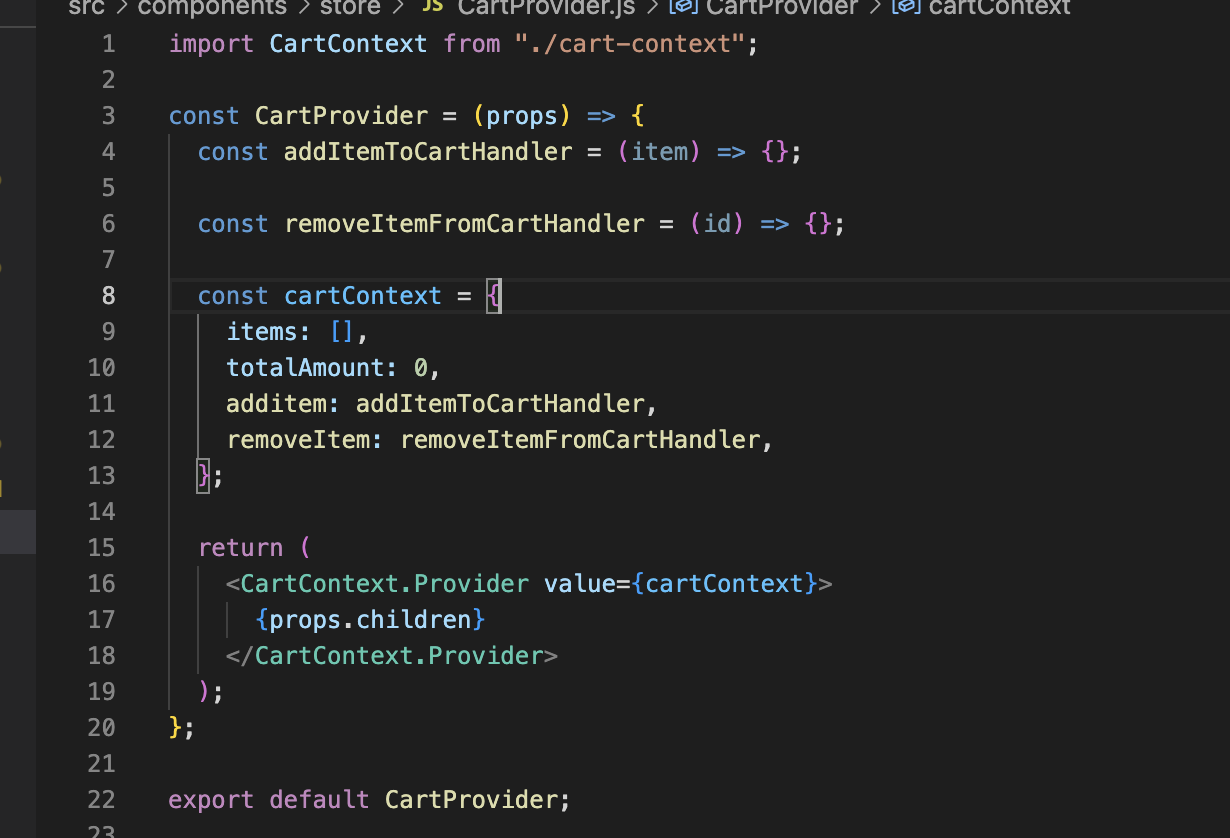
So we define cartContext like this and use it as props.
We will send this data using value props in provider and since provider has this value we can use it anywhere when it's surrounded by provider.
Reduce
The reduce() method executes a user-supplied "reducer" callback function on each element of the array, in order, passing in the return value from the calculation on the preceding element. The final result of running the reducer across all elements of the array is a single value.
The first time that the callback is run there is no "return value of the previous calculation". If supplied, an initial value may be used in its place. Otherwise the array element at index 0 is used as the initial value and iteration starts from the next element (index 1 instead of index 0).
Perhaps the easiest-to-understand case for reduce() is to return the sum of all the elements in an array:
const array1 = [1, 2, 3, 4];

// 0 + 1 + 2 + 3 + 4
const initialValue = 0;
const sumWithInitial = array1.reduce(
  (accumulator, currentValue) => accumulator + currentValue,
  initialValue
);

console.log(sumWithInitial);
// expected output: 10
The reducer walks through the array element-by-element, at each step adding the current array value to the result from the previous step (this result is the running sum of all the previous steps) — until there are no more elements to add.

We used reduce and get the array and generate the one value.
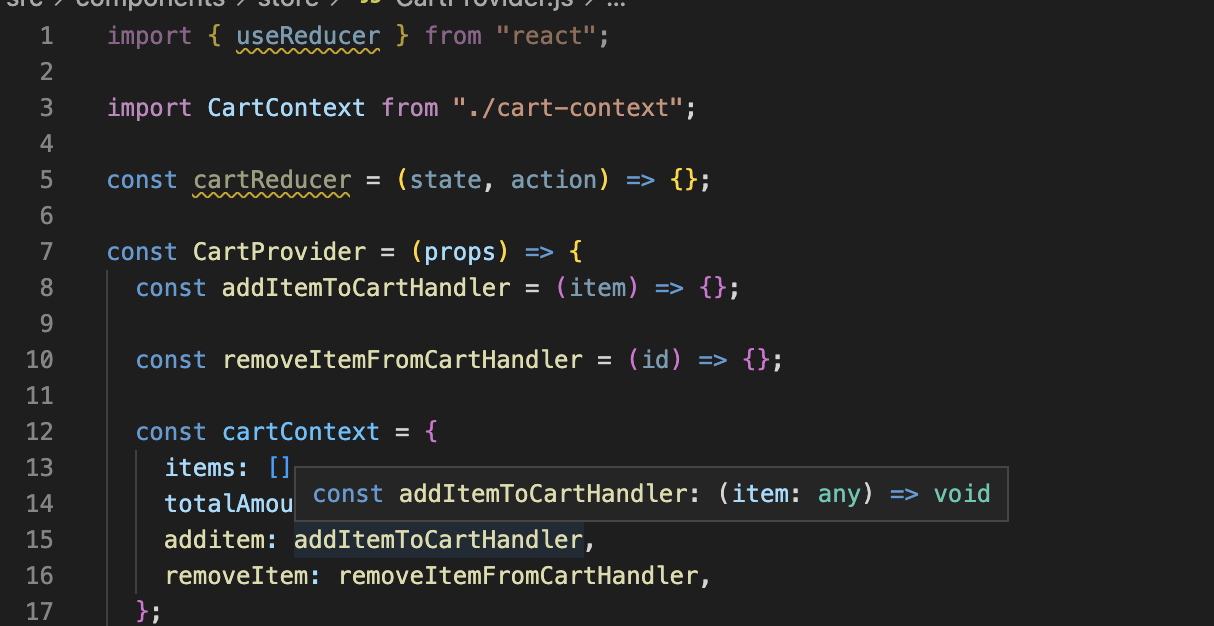
For adding cart items, we need to go to the CartProvider because that's where we manage out cart data in the end.
And here we've got this addItemToCartHandler.
Now, whenever this function is called, we get the item that should be added to the cart.
And of course we wanna manage this as state in this component so that this component and the context and any components affected by the context are re-evaluated whenever the cart data changes.
So here we wanna import useState or useReducer.
Both are React hooks which allow us to manage state and we will go for useReducer here becuase this will be a bit of a more complex state, which we're managing here because we'll have to check whether a meal is already part of the cart or not and for removing, we'll also have more complex logic.
Hence we will use useReducer for managing the state here.
We learned that in the reducer functions, we receive a state object and an action automatically by React.
The action is dispatched by you later in our code and the state is simply the last state snapshot of the state managed by the reducer.
And then as part of the reducer function, we have to return a new state snapshot.
useReducer
const [state, dispatch] = useReducer(reducer, initialArg, init);An alternative to useState. Accepts a reducer of type (state, action) => newState, and returns the current state paired with a dispatch method. (If you’re familiar with Redux, you already know how this works.)
useReducer is usually preferable to useState when you have complex state logic that involves multiple sub-values or when the next state depends on the previous one. useReducer also lets you optimize performance for components that trigger deep updates because you can pass dispatch down instead of callbacks.
Here’s the counter example from the useState section, rewritten to use a reducer:
const initialState = {count: 0};

function reducer(state, action) {
  switch (action.type) {
    case 'increment':
      return {count: state.count + 1};
    case 'decrement':
      return {count: state.count - 1};
    default:
      throw new Error();
  }
}

function Counter() {
  const [state, dispatch] = useReducer(reducer, initialState);
  return (
    <>
      Count: {state.count}
      <button onClick={() => dispatch({type: 'decrement'})}>-</button>
      <button onClick={() => dispatch({type: 'increment'})}>+</button>
    </>
  );
}
.push() vs .concat()
push makes new array and concat just adds new item in array.
And here we wanna update our data in immutable way.
useRef
const refContainer = useRef(initialValue);useRef returns a mutable ref object whose .current property is initialized to the passed argument (initialValue). The returned object will persist for the full lifetime of the component.
A common use case is to access a child imperatively:
function TextInputWithFocusButton() {
  const inputEl = useRef(null);
  const onButtonClick = () => {
    // `current` points to the mounted text input element
    inputEl.current.focus();
  };
  return (
    <>
      <input ref={inputEl} type="text" />
      <button onClick={onButtonClick}>Focus the input</button>
    </>
  );
}
Essentially, useRef is like a “box” that can hold a mutable value in its .current property.
You might be familiar with refs primarily as a way to access the DOM. If you pass a ref object to React with <div ref={myRef} />, React will set its .current property to the corresponding DOM node whenever that node changes.
However, useRef() is useful for more than the ref attribute. It’s handy for keeping any mutable value around similar to how you’d use instance fields in classes.
This works because useRef() creates a plain JavaScript object. The only difference between useRef() and creating a {current: ...} object yourself is that useRef will give you the same ref object on every render.
Keep in mind that useRef doesn’t notify you when its content changes. Mutating the .current property doesn’t cause a re-render. If you want to run some code when React attaches or detaches a ref to a DOM node, you may want to use a callback ref instead.
Here this ref is from below ref.
Sources
Using React Portals to build a modal | LogRocket Blog
Learn how to build a modal or overlay component in React with React Portals. Our demo is applicable for all top level components.
blog.logrocket.com
https://blog.bitsrc.io/understanding-react-portals-ab79827732c7
Understanding React Portals
Understanding React Portals with real-life examples
blog.bitsrc.io
https://www.freecodecamp.org/news/react-context-for-beginners/
React Context for Beginners – The Complete Guide (2021)
React context is an essential tool for every React developer to know. It lets you easily share state in your applications. In this comprehensive guide, we will cover what React context is, how to use it, when and when not to use context, and lots more. Eve
www.freecodecamp.org
https://reactjs.org/docs/hooks-reference.html#usereducer
Hooks API Reference – React
A JavaScript library for building user interfaces
reactjs.org
https://reactjs.org/docs/hooks-reference.html#useref
Hooks API Reference – React
A JavaScript library for building user interfaces
reactjs.org