Section 27: Handling File Uploads - Saving Those Beautiful Images

The goals
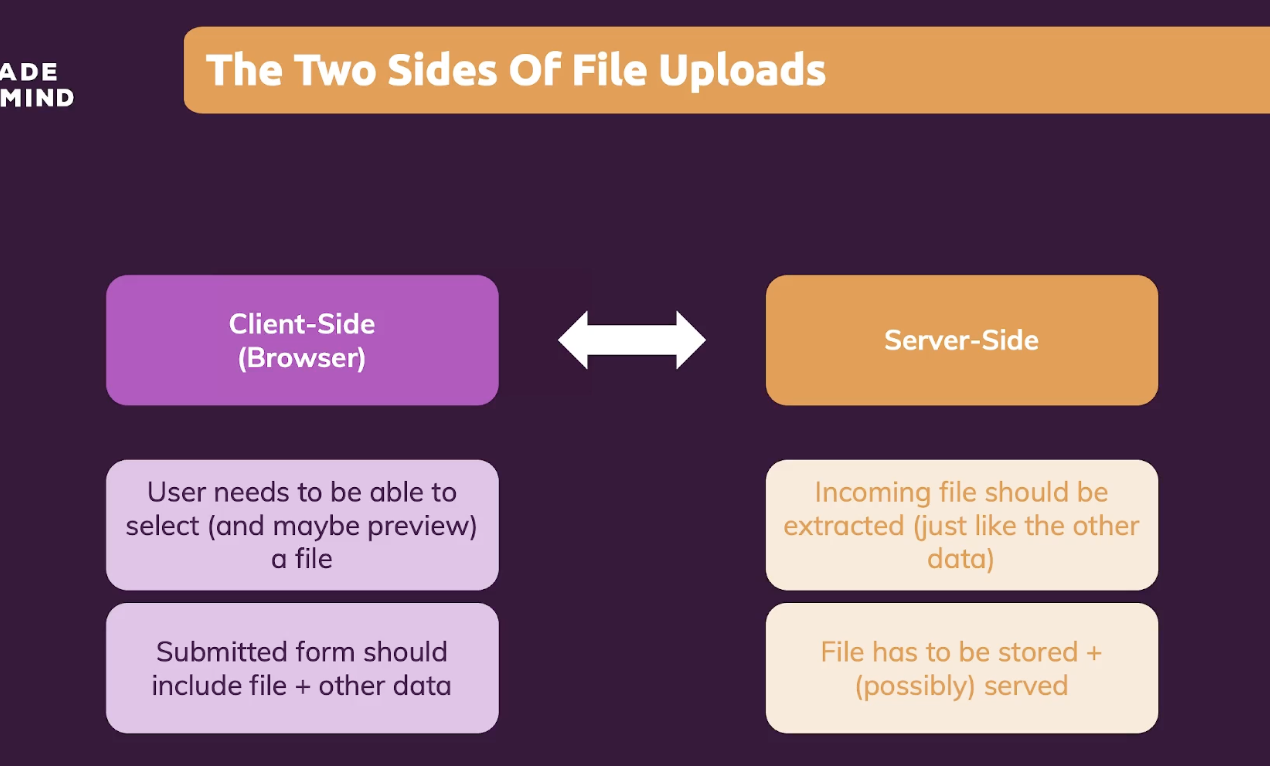
💪🏻The Different Parts Of "Uploading Files"
✌🏻Selecting & Uploading Files
👍🏻Storing & Serving Uploaded Files
The Two Sides Of File Uploads
<main id="new-user">
<form action="/profiles" method="POST">
<div class="form-control">
<label for="username">Username</label>
<input type="text" id="username" name="username" required>
</div>
<div class="form-control">
<label for="image">User image</label>
<!-- <input type="file" id="image" name="image"> -->
</div>
<button class="btn">Save User</button>
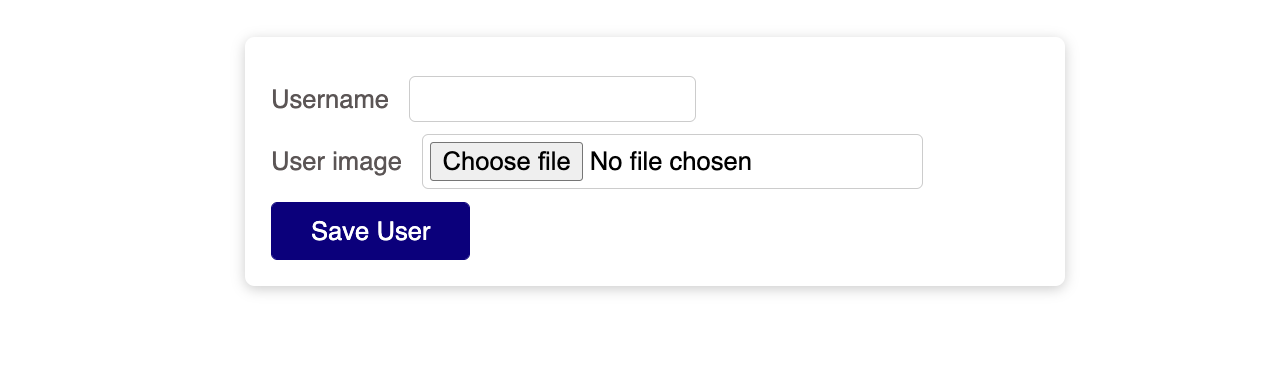
</form>
</main>When the code is like above, we get this page.

<main id="new-user">
    <form action="/profiles" method="POST">
      <div class="form-control">
        <label for="username">Username</label>
        <input type="text" id="username" name="username" required>
      </div>
      <div class="form-control">
        <label for="image">User image</label>
        <input type="file" id="image" name="image">
      </div>
      <button class="btn">Save User</button>
    </form>
  </main>
Here I put 'input' with type file, then it looks like this.
HTML attribute: accept
The accept attribute takes as its value a comma-separated list of one or more file types, or unique file type specifiers, describing which file types to allow.
The accept property is an attribute of the file <input> type. It was supported on the <form> element, but was removed in favor of file.
Because a given file type may be identified in more than one manner, it's useful to provide a thorough set of type specifiers when you need files of specific type, or use the wild card to denote a type of any format is acceptable.
For instance, there are a number of ways Microsoft Word files can be identified, so a site that accepts Word files might use an <input> like this:
<input
  type="file"
  id="docpicker"
  accept=".doc,.docx,application/msword,application/vnd.openxmlformats-officedocument.wordprocessingml.document" />
Whereas if you're accepting a media file, you may want to be include any format of that media type:
<input type="file" id="soundFile" accept="audio/*" />
<input type="file" id="videoFile" accept="video/*" />
<input type="file" id="imageFile" accept="image/*" />
The accept attribute doesn't validate the types of the selected files; it provides hints for browsers to guide users towards selecting the correct file types. It is still possible (in most cases) for users to toggle an option in the file chooser that makes it possible to override this and select any file they wish, and then choose incorrect file types.
Because of this, you should make sure that expected requirement is validated server-side.
<form method="post" enctype="multipart/form-data">
  <div>
    <label for="profile_pic">Choose file to upload</label>
    <input
      type="file"
      id="profile_pic"
      name="profile_pic"
      accept=".jpg, .jpeg, .png" />
  </div>
  <div>
    <button>Submit</button>
  </div>
</form>
HTML <form> enctype Attribute
Example
Send form-data encoded as "multipart/form-data":
<form action="/action_page_binary.asp" method="post" enctype="multipart/form-data">
  <label for="fname">First name:</label>
  <input type="text" id="fname" name="fname"><br><br>
  <label for="lname">Last name:</label>
  <input type="text" id="lname" name="lname"><br><br>
  <input type="submit" value="Submit">
</form>
Attribute Values
| Value | Description |
| application/x-www-form-urlencoded | Default. All characters are encoded before sent (spaces are converted to "+" symbols, and special characters are converted to ASCII HEX values) |
| multipart/form-data | This value is necessary if the user will upload a file through the form |
| text/plain | Sends data without any encoding at all. Not recommended |
In most cases, the default works very well, so it’s not necessary to specify an enctype. The one exception is any form where you invite file uploads. In this case, you must specify the multipart/form-data value for the enctype attribute for efficient and effective file transmission.
Multer
Multer is a node.js middleware for handling multipart/form-data, which is primarily used for uploading files. It is written on top of busboy for maximum efficiency.
Multer is a Node.js middleware for handling multipart/form-data that makes the otherwise painstaking process of uploading files in Node.js much easier.
Multer is a middleware designed to handle multipart/form-data in forms. It is similar to the popular Node.js body-parser, which is built into Express middleware for form submissions. But, Multer differs in that it supports multipart data, only processing multipart/form-data forms.
Multer does the work of body-parser by attaching the values of text fields in the req.body object. Multer also creates a new object for multiple files, either req.file or req.files, which holds information about those files. From the file object, you can pick whatever information is required to post the file to a media management API, like Cloudinary.
const express = require('express');
const multer = require('multer');

const upload = multer({});
const router = express.Router();
So here in our case, we wrote code like this to use as 'upload'
router.post('/profiles', upload.single('image') , function(req,res) {

})
When we make router, we can use any middleware in this router even as many as we can.
Usually we used function which is also kind of middleware.
So we will upload single file which has name 'image' and it will apply to all of the single request that are received by this route.
Where Should We Store Uploaded Files?
Databases are not supposed to store files. Databases are only for the simple resources like id, name, password etc..
So we need to send it to File system which is also called 'Hard Drive'.

const express = require('express');
const multer = require('multer');

const upload = multer({ dest: 'images' });
const router = express.Router();

router.get('/', function(req, res) {
  res.render('profiles');
});

router.get('/new-user', function(req, res) {
  res.render('new-user');
});

router.post('/profiles', upload.single('image') , function(req,res) {
  const uploadedImageFile = req.file;
  const userData = req.body;

  console.log(uploadedImageFile);
  console.log(userData);

  res.redirect('/');
})
module.exports = router;
And we set 'dest' which means 'destination' so if we upload the file can go to that direction.
So it's about setting specific path.
We made 'images' folder for this.
And then go back to the page and upload image file.

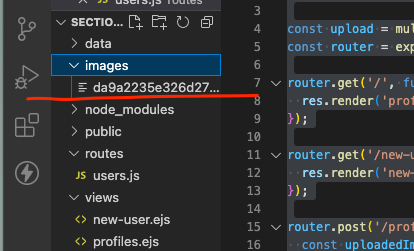
We can see that the image file successfully arrived into our folder.
But file name has been automatically generated so we need to change the name of it and it doesn't have extension so we need to modify it.
So for that we will write some code here,
const storageConfig = multer.diskStorage({
  destination: function(req, file, cb) {},
  filename:
});
cb means call back here.
Multer destination
example
const multer  = require('multer')
const upload = multer({ dest: './public/data/uploads/' })
app.post('/stats', upload.single('uploaded_file'), function (req, res) {
   // req.file is the name of your file in the form above, here 'uploaded_file'
   // req.body will hold the text fields, if there were any
   console.log(req.file, req.body)
});
API
File information
Each file contains the following information:
KeyDescriptionNote
| fieldname | Field name specified in the form | |
| originalname | Name of the file on the user’s computer | |
| encoding | Encoding type of the file | |
| mimetype | Mime type of the file | |
| size | Size of the file in bytes | |
| destination | The folder to which the file has been saved | DiskStorage |
| filename | The name of the file within the destination | DiskStorage |
| path | The full path to the uploaded file | DiskStorage |
| buffer | A Buffer of the entire file | MemoryStorage |
multer(opts)
Multer accepts an options object, the most basic of which is the dest property, which tells Multer where to upload the files. In case you omit the options object, the files will be kept in memory and never written to disk.
By default, Multer will rename the files so as to avoid naming conflicts. The renaming function can be customized according to your needs.
The following are the options that can be passed to Multer.
KeyDescription
| dest or storage | Where to store the files |
| fileFilter | Function to control which files are accepted |
| limits | Limits of the uploaded data |
| preservePath | Keep the full path of files instead of just the base name |
In an average web app, only dest might be required, and configured as shown in the following example.
const upload = multer({ dest: 'uploads/' })
If you want more control over your uploads, you’ll want to use the storage option instead of dest. Multer ships with storage engines DiskStorage and MemoryStorage; More engines are available from third parties.
multer를 사용해 이미지를 업로드 및 폼데이터를 처리하는 법 - 제로초 블로그 참고
보통 JSON 형식으로 된 데이터는 AJAX로든 폼 태그로든 쉽게 업로드할 수 있습니다. 하지만 이미지 파일만큼은 사람들의 골치를 썩이는데요. express와 함께 사용하면 쉽게 이미지 업로드를 도와주는 multer 모듈이 있습니다.
npm i multer이제 설치된 multer를 사용해 코딩을 해봅시다. 익스프레스 라우터 부분에 다음을 추가해줍니다.
const multer = require('multer');
// 기타 express 코드
const upload = multer({ dest: 'uploads/', limits: { fileSize: 5 * 1024 * 1024 } });
app.post('/up', upload.single('img'), (req, res) => {
  console.log(req.file);
});
이제 폼데이터나 폼 태그를 통해 업로드한 이미지를 올리면 req.file로 정보가 들어오고, dest 속성에 지정해둔 경로에 이미지가 저장됩니다. limits 속성은 선택 사항인데 여러 가지 제한을 걸 수 있습니다. 위에서는 파일 사이즈를 5MB로 제한했습니다. 폼데이터로 업로드하는 강좌는 여기를 참고하세요. upload.single('img') 미들웨어를 라우터 콜백함수 전에 끼워넣었는데요. 폼데이터의 속성명이 img이거나 폼 태그 인풋의 name이 img인 파일 하나를 받겠다는 뜻입니다. 이미지가 아닌 나머지 데이터는 그대로 req.body에 들어옵니다.
만약 이미지를 하나가 아닌 여러 개를 받고 싶다 하면 upload.array('키', 최대파일개수) 하면 됩니다. req.file 대신 req.files에 정보가 담깁니다.
app.post('/up', upload.array('img'), (req, res) => {
  console.log(req.files);
});
만약 여러 개의 키로 이미지를 올렸다면 upload.fields를 써야 합니다(이외에 upload.none도 있습니다). 사용한 키들을 배열 안에 넣어주면 됩니다.
app.post('/up', upload.fields([{ name: 'img' }, { name: 'photos' }]), (req, res) => {
  console.log(req.files);
});
문제는 uploads 폴더에 뭔가 생성이 되긴 하는데 이름도 ce243370b74107493fea0743d249a176처럼 이상하게 바뀌어있고 확장자도 붙어 있지 않아 쓸 수가 없습니다. 사실 이것은 보안상 의도된 것이지만 지금은 불편하기 때문에 이름이 원래대로 나오게 해보겠습니다. dest 속성 대신 storage 속성을 사용해 upload 변수에 넣어주면 됩니다.
const upload = multer({
  storage: multer.diskStorage({
    destination: function (req, file, cb) {
      cb(null, 'uploads/');
    },
    filename: function (req, file, cb) {
      cb(null, file.originalname);
    }
  }),
});
네. 조금 복잡해졌긴 하지만 위의 코드를 보시면 저장될 경로(destination)과 파일명(filename)을 조작하고 있음을 알 수 있습니다. 이제 다시 파일을 올리면 원본 파일명 그대로 올라갑니다. 그런데 파일명이 중복되는 경우 문제가 생길 수 있죠. 파일명을 타임스탬프로 해서 중복되지 않게 해봅시다.
const path = require('path');
const upload = multer({
  storage: multer.diskStorage({
    destination: function (req, file, cb) {
      cb(null, 'uploads/');
    },
    filename: function (req, file, cb) {
      cb(null, new Date().valueOf() + path.extname(file.originalname));
    }
  }),
});
위와 같이 하시면 타임스탬프.확장자 형식으로 파일명이 지정됩니다.
지금까지는 실제 디스크에 파일을 업로드했는데요. S3같은 곳에 업로드하시는 분들도 있을 겁니다. S3에 업로드하는 방식은 크게 두 가지가 있는데요. 디스크에 있는 파일을 업로드하거나, 파일 버퍼(메모리에 저장)를 업로드하는 겁니다. 파일을 S3에 업로드한 후에는 남아있는 파일을 지워줘야 하는데 이게 번거롭죠. 그래서 처음부터 메모리에 파일을 버퍼 형식으로 저장하고, 그것을 업로드하는 겁니다.
const upload = multer({
  storage: multer.memoryStorage(),
});
메모리스토리지를 쓸 경우는 req.file이나 req.files 안의 파일 데이터(객체)에, 디스크스토리지 전용 속성인 destination, filename, path 대신 buffer라는 속성이 새로 생기고 그 값으로 버퍼들이 저장됩니다. 이 버퍼를 사용해서 S3에 버퍼로 업로드하시면 됩니다. 이 방식의 단점은 파일이 여러 개고, 용량이 너무 크면 메모리를 초과해서 서버가 멈춰버릴 수도 있습니다. 보통은 그럴 일은 없겠지만 그럴 수도 있다는 것을 알아두세요. 이러한 문제가 걱정되고, 버퍼를 다루는 게 어렵다면 multer-s3 패키지를 고려해보세요.
const express = require('express');
const multer = require('multer');

const storageConfig = multer.diskStorage({
  destination: function(req, file, cb) {
    cb(null, 'images');
  },
  filename: function(req, file, cb) {
    cb(null, Date.now() + '-' + file.originalname);
  }
});

const upload = multer({ storage: storageConfig });
const router = express.Router();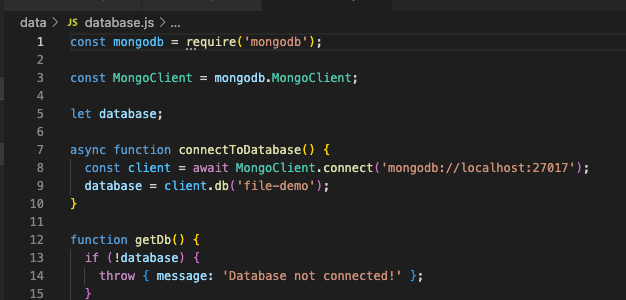
We have database connection like this,

And we wrote the code like this.
Now let's try to insert data into db.
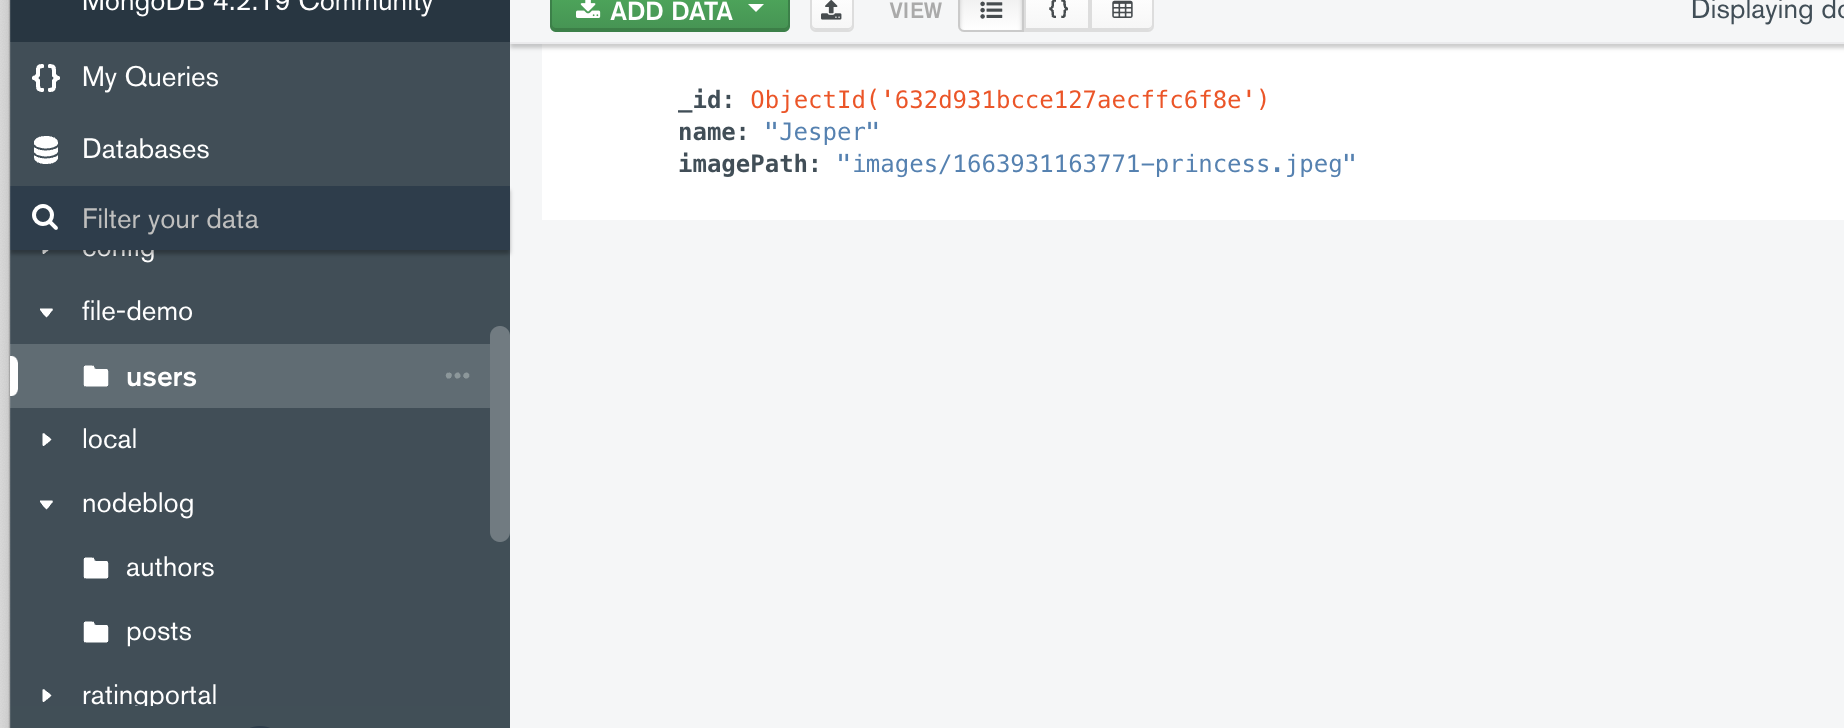
We can see that it arrived well
Now let's move on to the next step.
How can we show the list of our users on our start page?

Go to the main page route.
router.get('/', async function(req, res) {
  const users = await db.getDb().collection('users').find().toArray();
  res.render('profiles', {users});
});
FIx the code like this.
And since we gave all the data we fetch from database as 'users' to 'profiles' file. We can utillze data there.
<body>
  <main>
    <section id="user-controls">
      <a class="btn" href="/new-user">Add a New User</a>
    </section>
    <section id="user-profiles">
      <ul>
        <% for (const user of users) { %>
          <li class="user-item">
            <article>
              <img src="<%= user.imagePath %>" alt="The image of the user.">
              <h2><%= user.name %></h2>
            </article>
          </li>
        <% } %>
      </ul>
    </section>
  </main>
</body>
So it we try to fetch the data like this, would it work well?
No
If we go to our website after writing this code, we will get this error.
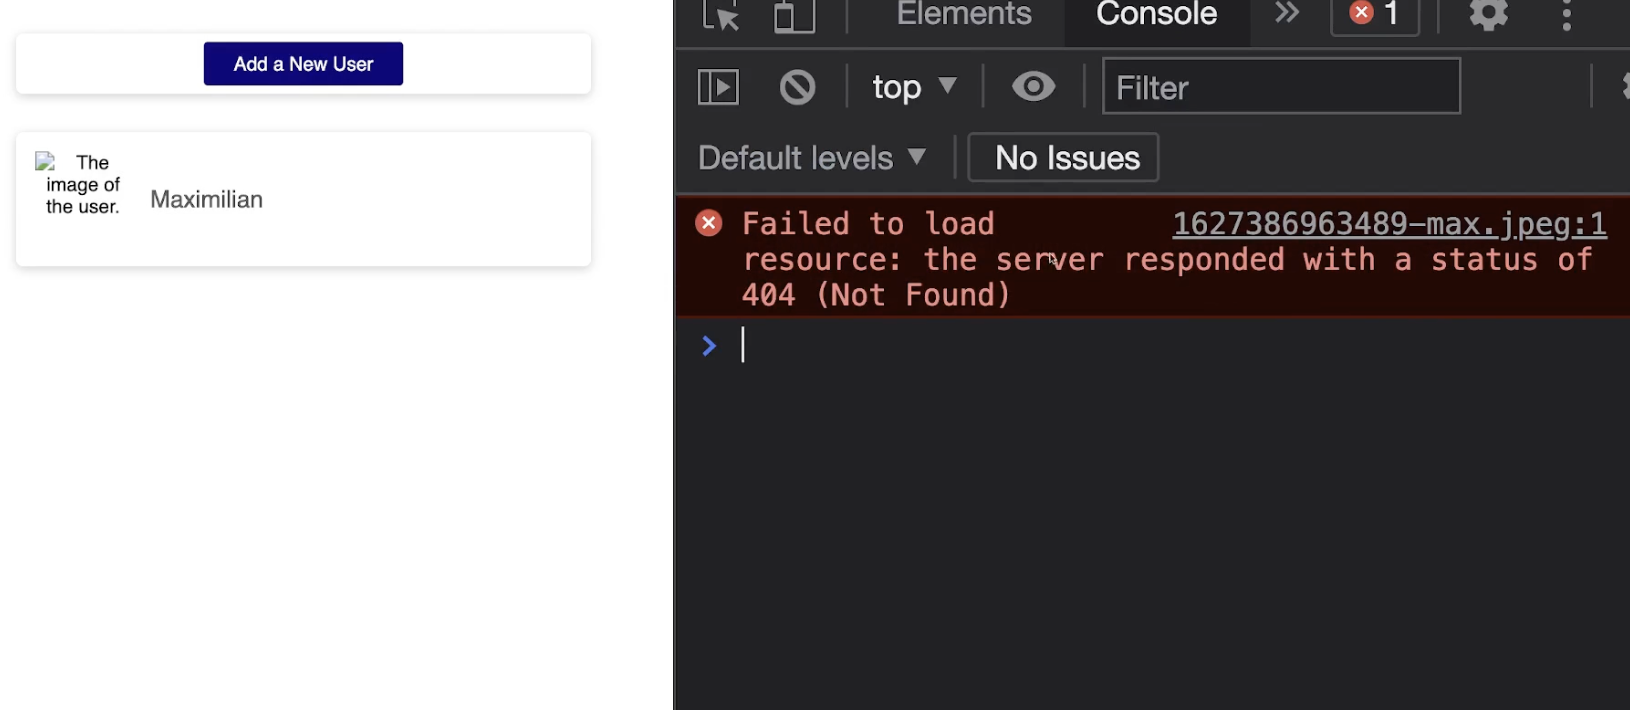
It couldn't find the file
If the user can control our files and data it would be quite serious issue for security.
So in app.js,
app.use(express.urlencoded({ extended: false }));
app.use(express.static('public'));
app.use(express.static('images'));
We added images folder to provide to users so they also can see our files.
But they can't do anything with it. Just can see our files.
And we can put condition here.
app.use('/images', express.static('images'));So only when the user enter into our webpage with /images they can see our resources
Now let's check how to make preview of profile picture when we upload in frontend
So for this we input the script in our html file.
  <link rel="stylesheet" href="/styles/base.css">
  <link rel="stylesheet" href="/styles/profiles.css">
  <script src="/scripts/file-preview.js" defer></script>
</head>
<body>
  <main id="new-user">
    <form action="/profiles" method="POST" enctype="multipart/form-data">
      <div class="form-control">
        <label for="username">Username</label>
        <input type="text" id="username" name="username" required>
      </div>
      <div class="form-control">
        <img id="image-preview" alt="Your picked image.">
        <label for="image">User image</label>
        <input type="file" id="image" name="image" required accept="image/jpg, image/png">
      </div>
      <button class="btn">Save User</button>
    </form>
  </main>
</body>
This is new-user file.
const filePickerElement = document.getElementById('image');
const imagePreviewElement = document.getElementById('image-preview');

function showPreview() {
  const files = filePickerElement.files;
  if (!files || files.length === 0) {
    imagePreviewElement.style.display = 'none';
    return;
  }

  const pickedFile = files[0];

  imagePreviewElement.src = URL.createObjectURL(pickedFile);
  imagePreviewElement.style.display = 'block';
}

filePickerElement.addEventListener('change', showPreview);
And this is file-preview.
We get to 'filePickerElement' and use 'files' property.
It's files not 'file', because theoritically you can use this for multi file.
And we wrote code here that if file doesn't exist or the length of file is zero which means equal to that we don't have file, then we will just hide the preview and return which means end.
And then we will make variable 'pickedFile' and its first item which means only item will be taken.
And we used URL which is JavaScript built-in item, and createObjectURL which is also the same to generate the url of this image source.
Souces
https://www.w3schools.com/tags/att_form_enctype.asp
HTML form enctype Attribute
W3Schools offers free online tutorials, references and exercises in all the major languages of the web. Covering popular subjects like HTML, CSS, JavaScript, Python, SQL, Java, and many, many more.
www.w3schools.com
https://html.com/attributes/form-enctype/
Attribute for ENCTYPE = "multipart/form-data" | "application/x-www-form-urlencoded" | "text/plain"
The enctype attribute lets you specify an encoding type for your form.
html.com
https://www.npmjs.com/package/multer
multer
Middleware for handling `multipart/form-data`.. Latest version: 1.4.5-lts.1, last published: 4 months ago. Start using multer in your project by running `npm i multer`. There are 3447 other projects in the npm registry using multer.
www.npmjs.com
https://expressjs.com/en/resources/middleware/multer.html
Express multer middleware
Multer Multer is a node.js middleware for handling multipart/form-data, which is primarily used for uploading files. It is written on top of busboy for maximum efficiency. NOTE: Multer will not process any form which is not multipart (multipart/form-data).
expressjs.com
https://www.zerocho.com/category/NodeJS/post/5950a6c4f7934c001894ea83
https://www.zerocho.com/category/NodeJS/post/5950a6c4f7934c001894ea83
www.zerocho.com
https://wayhome25.github.io/nodejs/2017/02/21/nodejs-15-file-upload/
nodejs 파일 업로드 - multer 모듈사용 · 초보몽키의 개발공부로그
multer 모듈을 통해서 post로 전송된 파일의 저장경로와 파일명 등을 처리한다.
wayhome25.github.io
https://victorydntmd.tistory.com/39
[Node.js] 파일 업로드 ( multer 모듈 )
2019. 07. 21 수정 이번 글에서는 파일을 업로드하는 방법을 알아보도록 하겠습니다. 개발환경 express-generator 4.16.1 multer 1.4.2 1. 준비작업 1) npm 설치 body-parser 모듈과 multer 모듈을 사용해서 파..
victorydntmd.tistory.com