Section 13: Routing - Multiple Pages in Single-Page-Apps

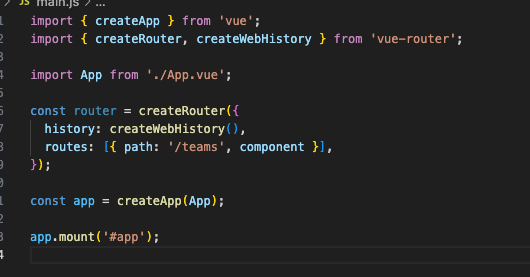
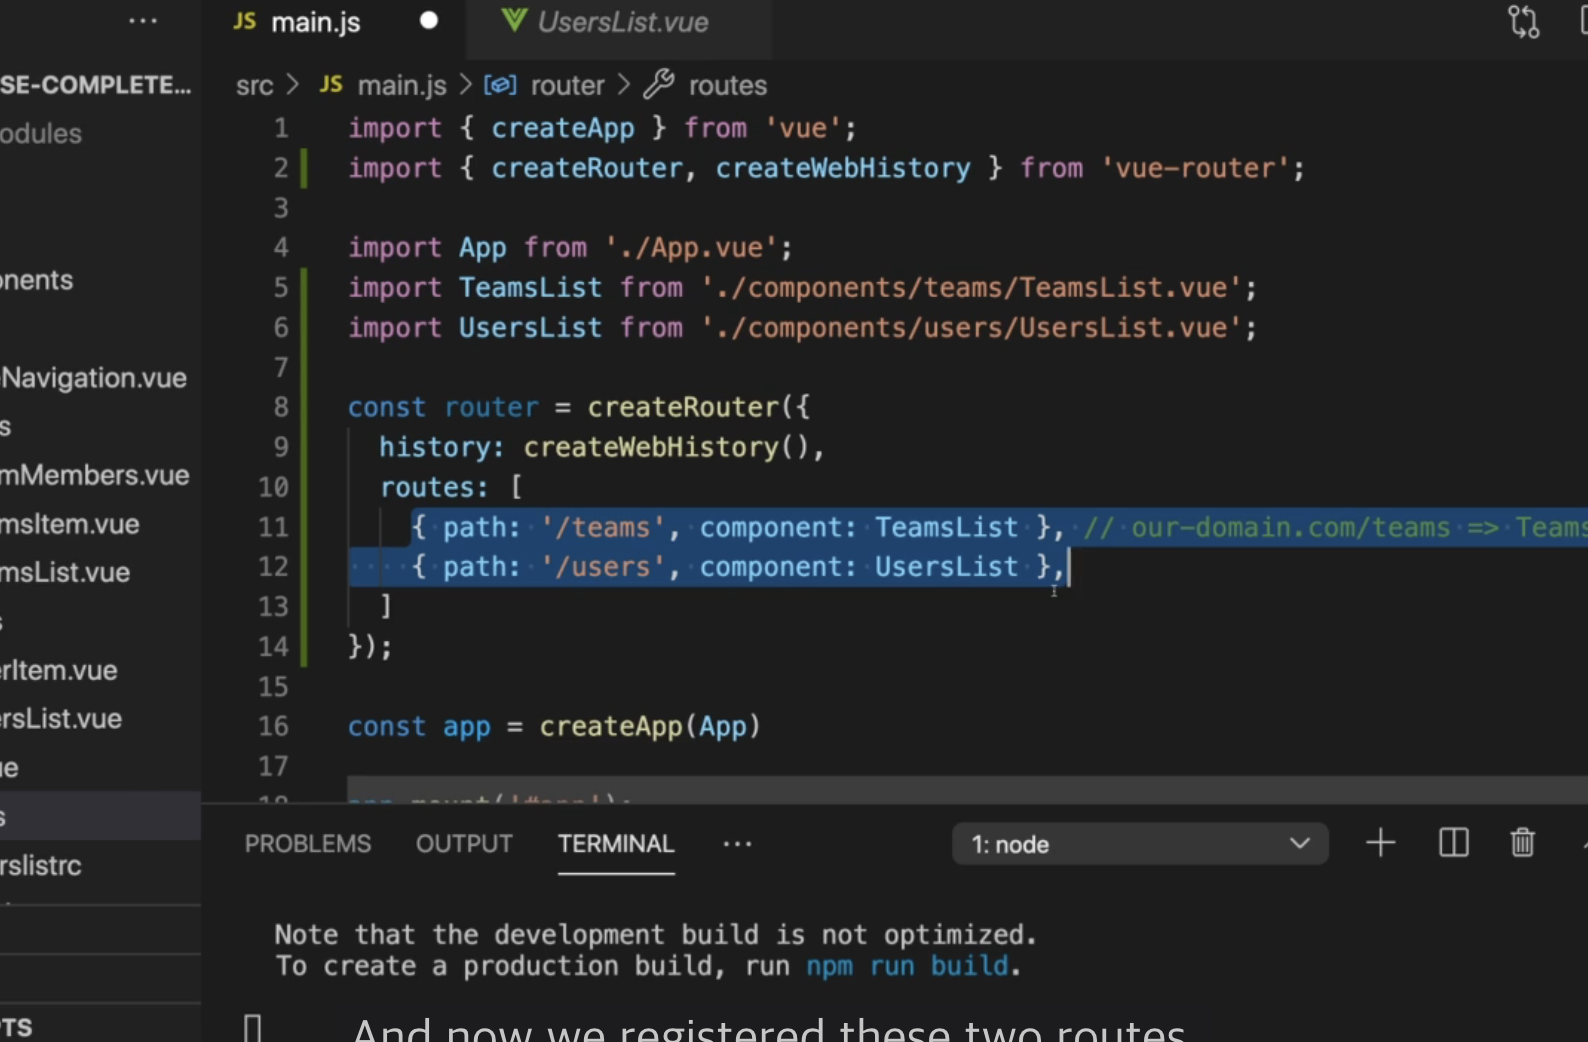
usually routes are plural not singe, cause then there is no meaning of routing. So we use array.
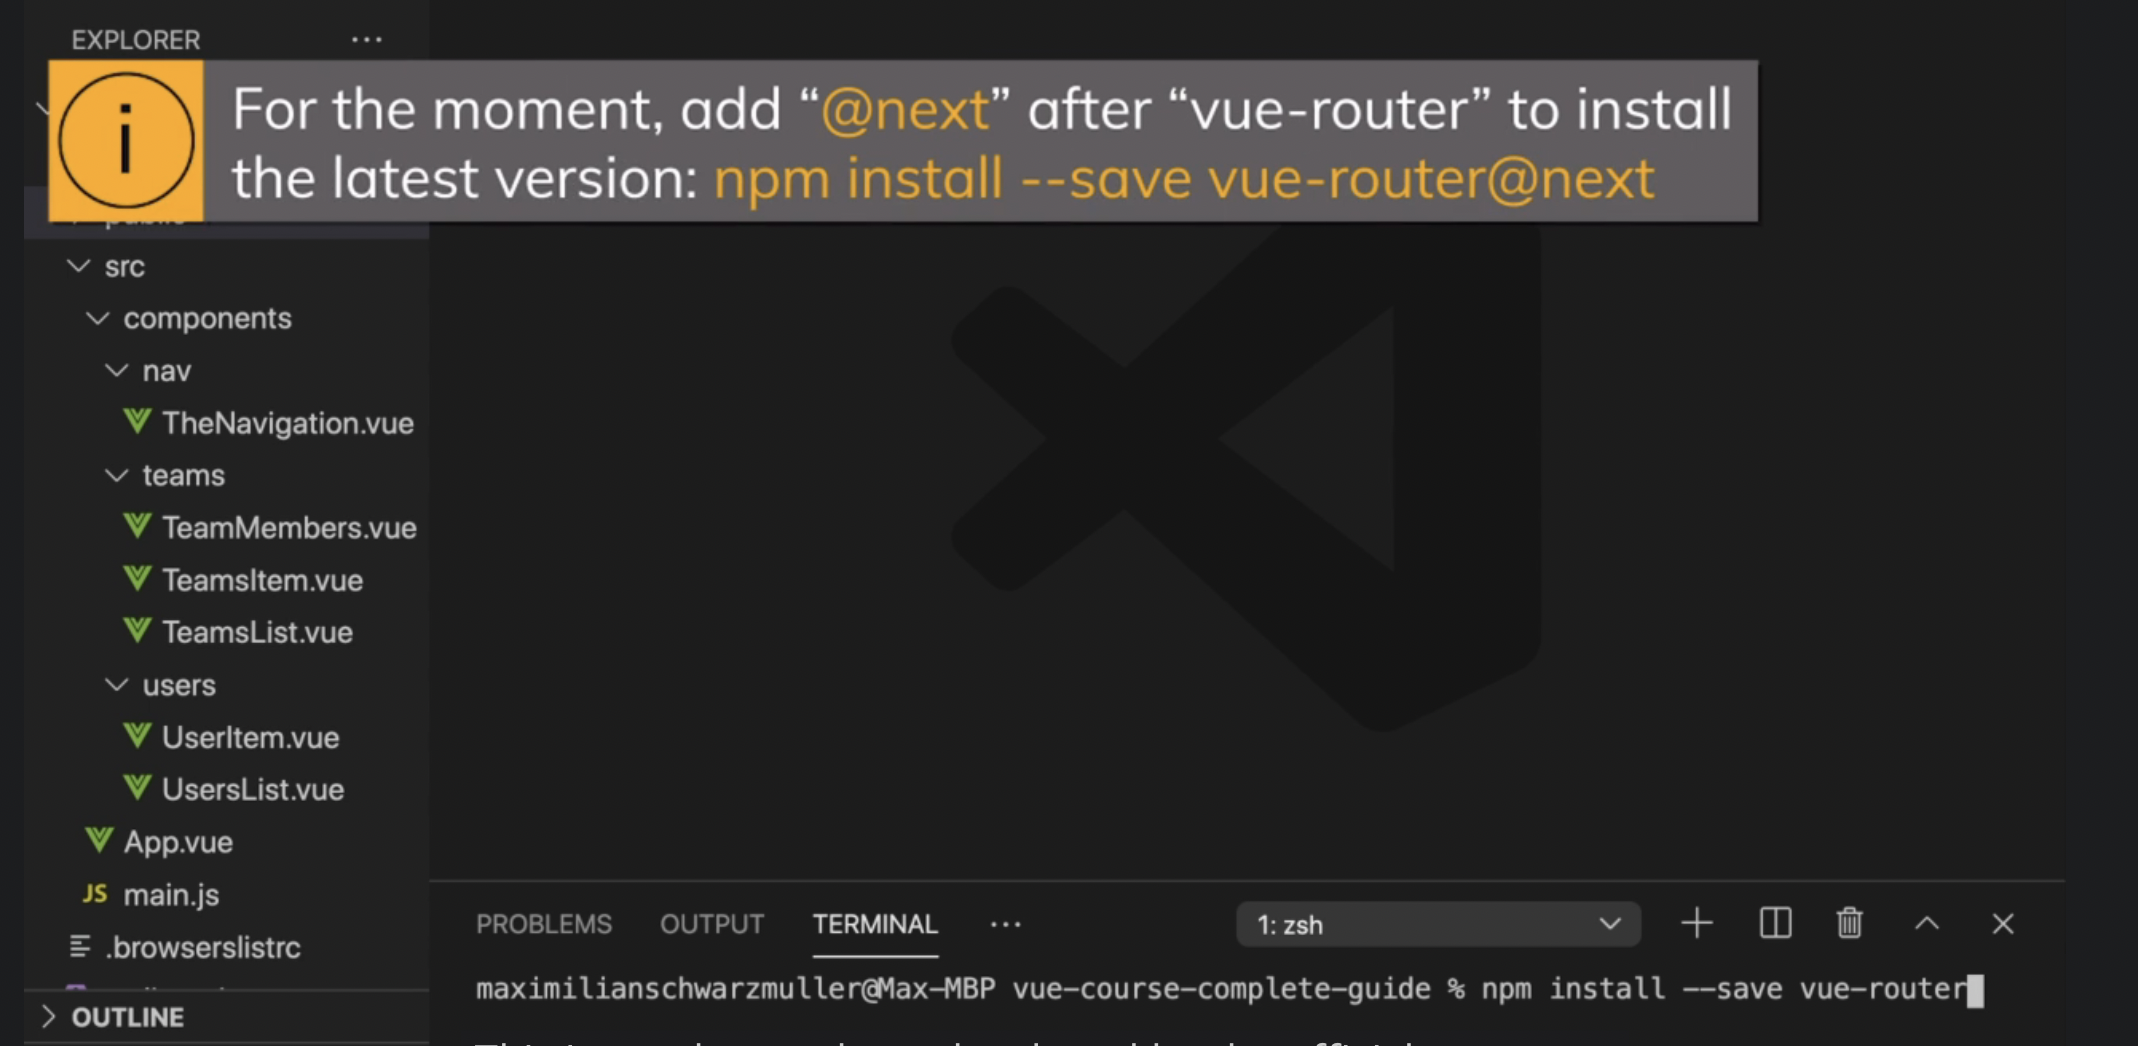
useful concept for single page application
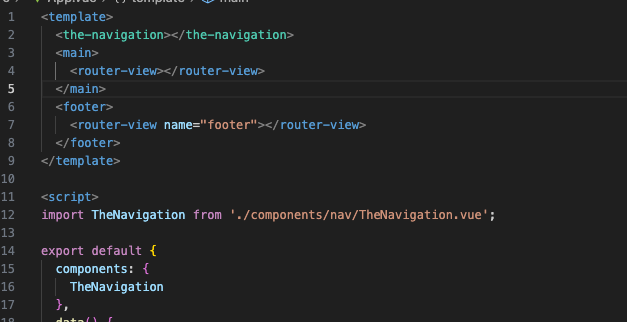
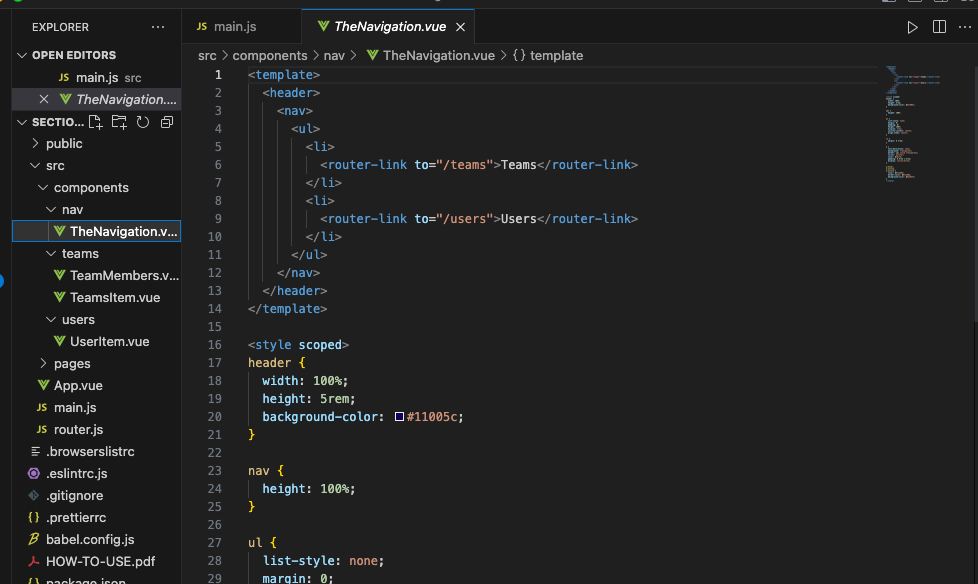
importing components and connect it to the path
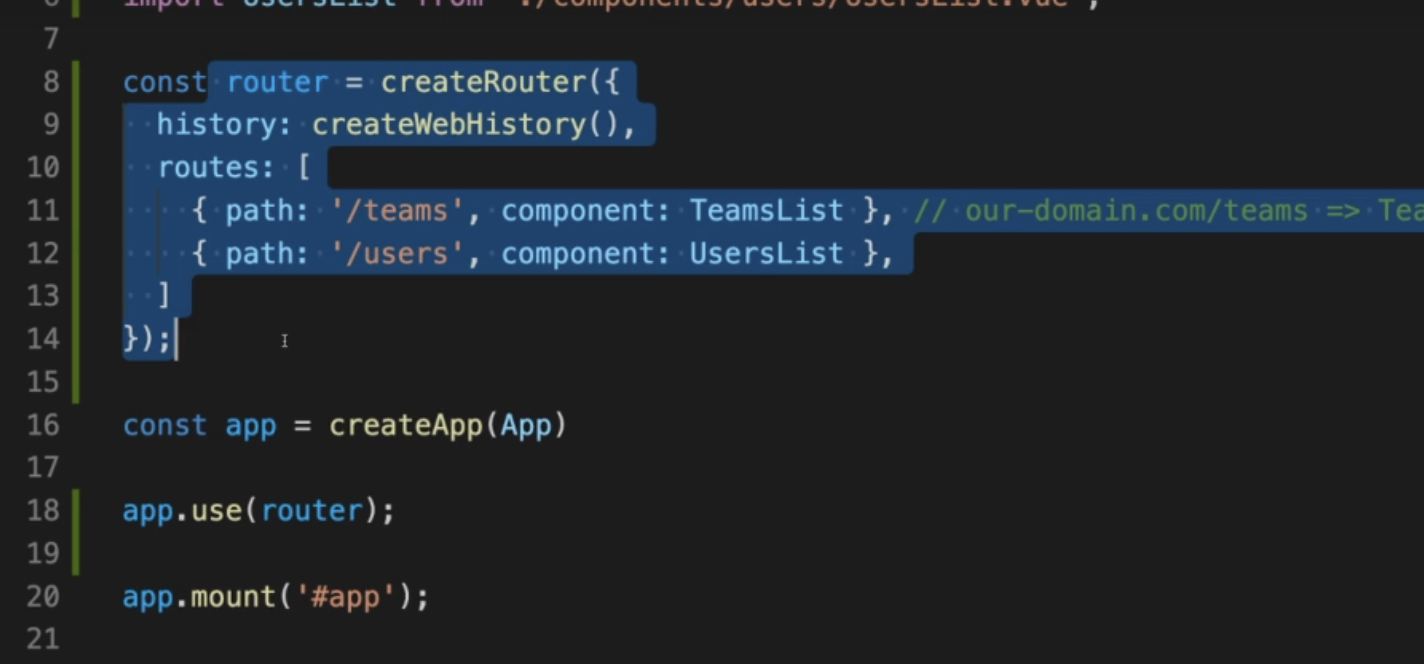
we need to make Vue to know about this router setting

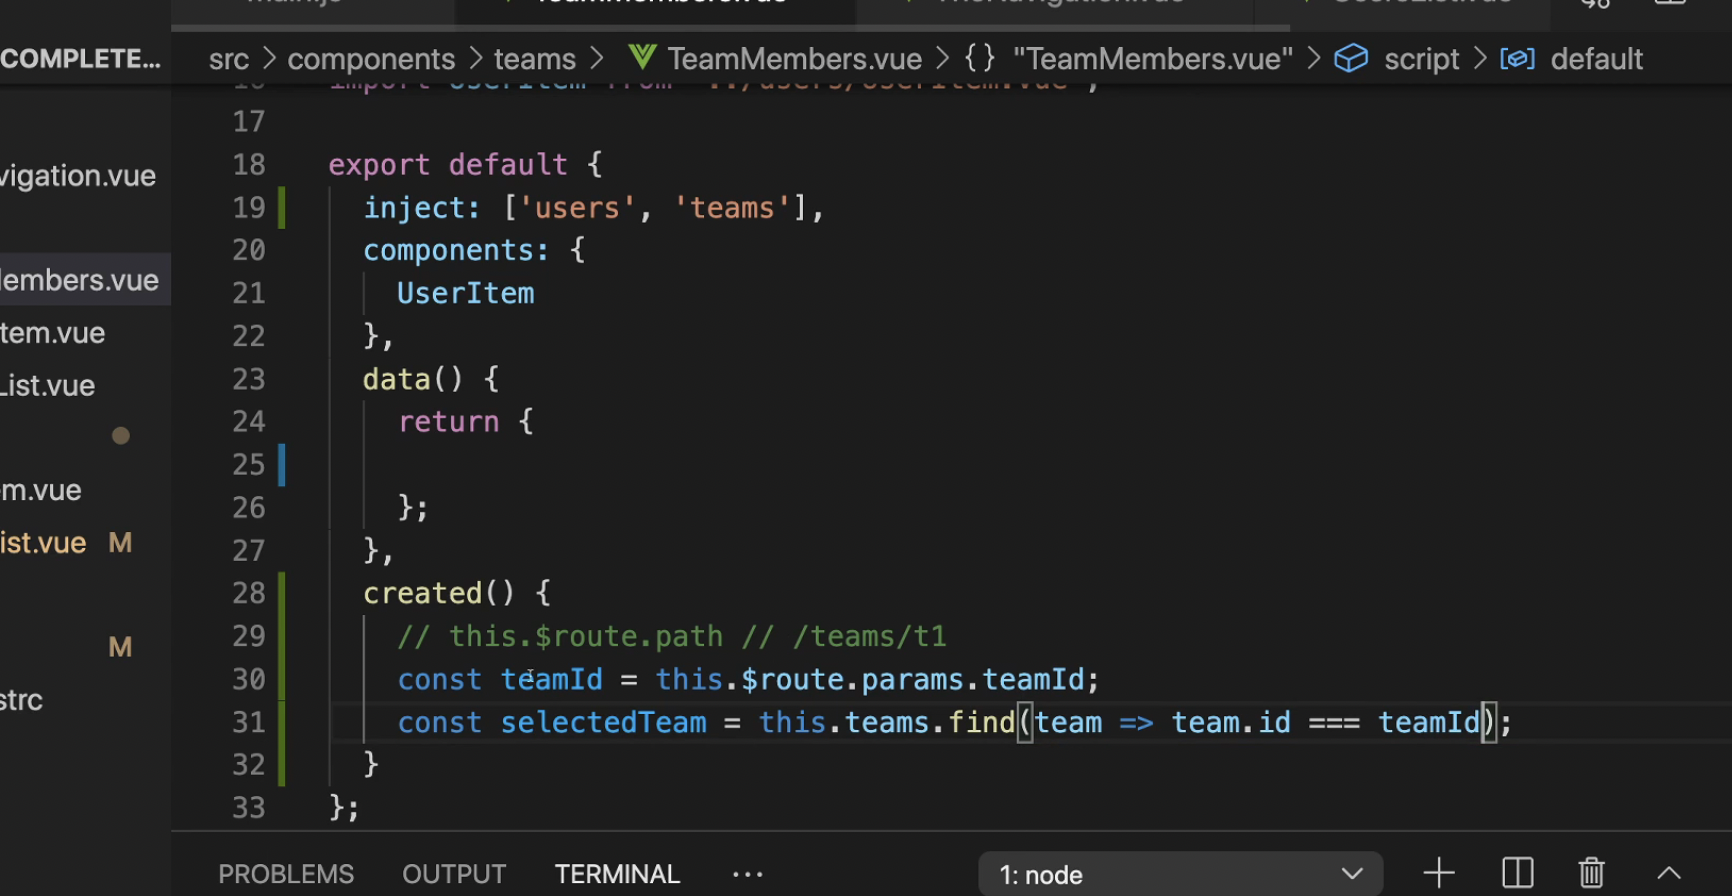
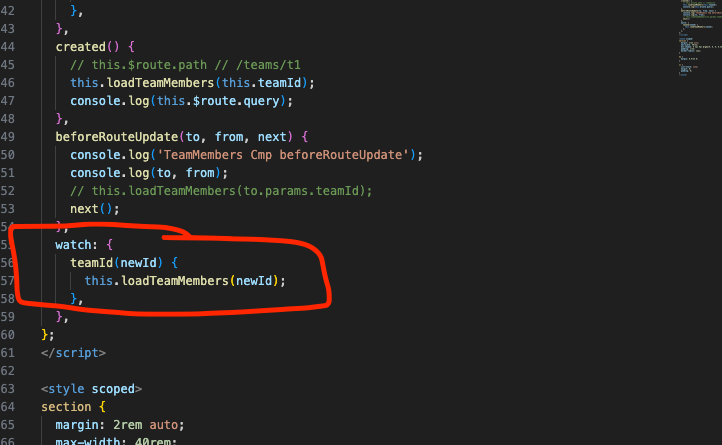
created() -> understand it as React
so if we change URL, vue doesn't get it as destroy the webpage and re-create, it's just updating the changed parts.
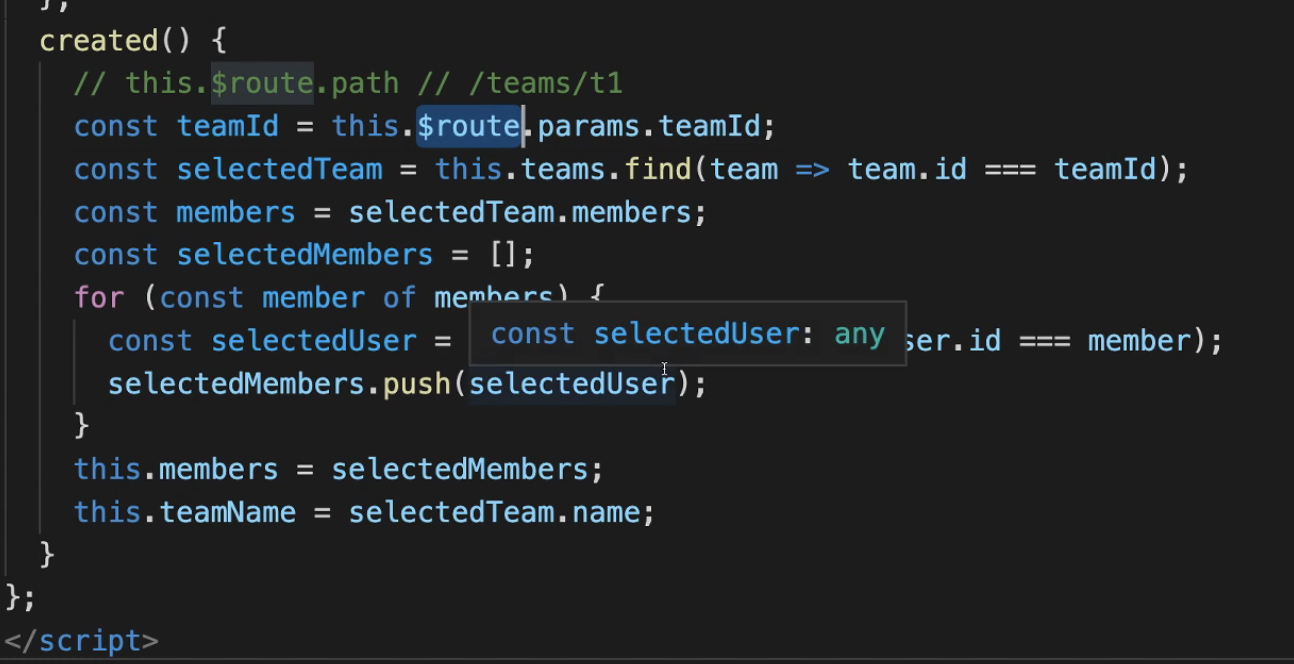
So if we wanna re-load the page with the different data and different parameter, then we should focus on $route, which holds the latest data
So we can watch it for changes
Created() vs Mounted()
In Vue.js, both the created() and mounted() lifecycle hooks are used to perform actions at specific stages during the lifecycle of a Vue component. However, there are differences between the two hooks in terms of when they are executed and the purpose they serve:
created():
The created() hook is called when the component's instance is created but has not been mounted or inserted into the DOM yet.
It is useful for performing initialization tasks, such as setting up data, initializing properties, or making API requests that do not rely on the component being in the DOM.
At this stage, the component has been initialized, but its template has not been compiled or rendered yet.
mounted():
The mounted() hook is called after the component has been inserted into the DOM.
It is often used for tasks that require access to the component's rendered DOM elements or manipulating the DOM directly.
You can safely interact with the component's template, access its child components, or use third-party libraries that depend on the DOM.
This hook is commonly used for fetching data from APIs or performing initial DOM manipulations.
To summarize, the created() hook is executed when the component is initialized, and the mounted() hook is called after the component has been mounted into the DOM. Use created() for initialization tasks that don't rely on the DOM, and use mounted() for operations that require access to the component's rendered elements or the DOM itself.
Redirect vs Vue
In Vue Router, the redirect and alias are two different concepts used for configuring routes:
redirect:
The redirect option allows you to redirect a route to another route. It is used when you want to map one route to another route.
When a user navigates to a route that has a redirect configured, Vue Router will automatically redirect them to the specified route.
The redirect option can be defined as a string representing the path of the route to redirect to or as a function that returns the path dynamically based on certain conditions.
Redirects can be useful when you want to create aliases for routes or when you want to handle legacy URLs and redirect them to new routes.
alias:
The alias option allows you to create an alternative path for an existing route. It means that accessing the alias path will render the same component as the original route.
Unlike redirect, which performs an actual redirection, alias doesn't change the URL in the browser's address bar. It simply allows accessing the same content through different URLs.
You can specify the alias option as a string or an array of strings representing the alternative paths for a route.
Aliases can be useful when you want to provide multiple entry points to the same content or when you want to maintain backward compatibility for certain URLs.
To illustrate with an example, let's consider a simple Vue Router configuration:
const routes = [
  { path: '/home', component: Home },
  { path: '/dashboard', component: Dashboard },
  { path: '/admin', redirect: '/dashboard' },
  { path: '/legacy', alias: '/home' }
];
In this example:
Navigating to /home will render the Home component.
Navigating to /dashboard will render the Dashboard component.
Navigating to /admin will be automatically redirected to /dashboard.
Accessing /legacy will render the same Home component as /home, but the URL in the browser's address bar will remain as /legacy.
By using redirect and alias options in Vue Router, you can control the navigation flow and provide more flexible URL configurations for your Vue applications.
{ path: '/:notFound(.*)', component: NotFound }This route configuration is defining a dynamic route with a parameter called notFound and a wildcard (.*) to match any path that hasn't been matched by previous routes. It is typically used as a catch-all route to handle 404 or not found scenarios.
Here's an explanation of the configuration:
path: '/:notFound(.*)': This defines the path for the route. The :notFound part is a parameter prefixed with a colon (:), indicating that it's a dynamic parameter. The (.*) is a regular expression that matches any characters (including slashes) and allows the parameter to capture the entire unmatched path.
component: NotFound: This specifies the component that should be rendered when the route is matched. In this case, the NotFound component will be rendered for any unmatched paths.
So, if a user navigates to a URL that hasn't been matched by any other defined routes, such as /random-path or /non-existent-page, this catch-all route will be triggered, and the NotFound component will be rendered. This allows you to display a custom "Not Found" page or handle such cases in a specific way within your Vue application.
ScrollBehavior
In Vue.js, the "scroll behavior" refers to the behavior of the browser's scrolling mechanism when navigating between different routes or sections within a Vue application.
By default, when a user clicks on a link or performs a navigation action in a Vue application, the browser scrolls to the new route or section instantly. However, in some cases, you may want to customize this behavior to provide a smoother scrolling experience.
Vue Router, the official routing library for Vue.js, provides a feature called "scroll behavior" that allows you to customize the scrolling behavior when navigating between routes. This feature allows you to control how the browser scrolls to the new route.
You can configure the scroll behavior in the Vue Router configuration by providing a scrollBehavior function. The scrollBehavior function receives three arguments: to, from, and savedPosition. Here's an example of how you can define the scroll behavior in Vue Router:
import Vue from 'vue';
import Router from 'vue-router';

Vue.use(Router);

const router = new Router({
  // ... other configuration options ...

  scrollBehavior(to, from, savedPosition) {
    // You can customize the scroll behavior here

    // Scroll to the saved position if available
    if (savedPosition) {
      return savedPosition;
    }

    // Scroll to top by default
    return { x: 0, y: 0 };
  },
});

export default router;
In the above example, the scrollBehavior function is defined in the Vue Router configuration. It checks if there is a saved scroll position for the new route (savedPosition). If a saved position is available (e.g., when using the browser's back/forward navigation), it scrolls to the saved position. Otherwise, it scrolls to the top of the page by default.
You can customize the scroll behavior based on your application's requirements. For example, you can scroll to a specific element or implement smooth scrolling animations using JavaScript libraries like smooth-scroll.
It's worth noting that the scroll behavior is applied by the browser and may have limited support for older browsers. Additionally, the exact behavior may vary depending on the user's browser settings and platform.
beforeEach
In Vue.js, the beforeEach function is a navigation guard provided by Vue Router. Navigation guards allow you to control and modify the navigation behavior of your Vue application.
The beforeEach function is called before each navigation in your Vue application. It allows you to perform checks or actions before navigating to a new route. For example, you can use beforeEach to implement authentication checks, permission checks, or any other logic that needs to be executed before navigating to a new route.
Here's an example of how to use the beforeEach function in Vue Router:
import Vue from 'vue';
import Router from 'vue-router';

Vue.use(Router);

const router = new Router({
  // ... other configuration options ...
});

router.beforeEach((to, from, next) => {
  // Perform checks or actions before navigating to a new route

  // Example: Check if the user is authenticated
  if (to.meta.requiresAuth && !isAuthenticated()) {
    // Redirect to the login page if authentication is required but the user is not authenticated
    next('/login');
  } else {
    // Continue with the navigation
    next();
  }
});

export default router;
In the above example, the beforeEach function is used to check if the user is authenticated before navigating to a route that requires authentication (to.meta.requiresAuth). If the user is not authenticated, it redirects them to the login page. Otherwise, it allows the navigation to continue.
You can add the beforeEach function directly after creating the Vue Router instance. It will be called for every navigation in your application, allowing you to implement global navigation checks and actions.
Note that the beforeEach function is just one of the available navigation guards provided by Vue Router. Other navigation guards include beforeResolve, afterEach, and more. These navigation guards give you fine-grained control over the navigation flow of your Vue application.
It's important to be mindful of the asynchronous nature of some checks or actions inside the beforeEach function. If you need to perform an asynchronous operation, such as making an API call, you can use the next function with a callback or return a Promise to ensure the navigation is delayed until the operation completes.